21 Jun How To Remove Shower Doors
We have just moved into our new house (more like a 70s house than new!) and I have already completed a few projects. I know our plans are only to live in this place for a few years, with hopes of knocking it down to build a new one, but until that time there are a few things I wanted to do in the house to make it livable. Removing the shower doors was a HUGE priority in my book. I HATE shower doors, especially when they are probably the original 1978 doors that are completely disgusting!
Keep in mind, this whole bathroom is pretty bad. Brown tub, toilet, wallpaper, lighting…I mean they must have really loved brown. It looks like a dark cave, but none the less, I hate shower doors and need them gone. They weigh about 30 pounds each door and always are going off track. Also, have you ever tried to bath an infant with shower doors?? Totally impossible! Last night was bath night for my little guy, so it was time to get those doors off before he went to bed.
Here is the bathroom before:
Now I should start out by saying you need a few things to remove the doors: screw driver, bathtub caulking, rubbing alcohol, and maybe a blow dryer and scraper depending on how your doors are installed. Also, MOST importantly SAFETY GLASSES! I learned this the hard way, but first I should back up and tell you a story.
A few weeks ago, Thrifty Decor Chic had written a blog about a redo project gone wrong. She was attempting to paint her french door black and the project ended up with shattered glass everywhere. I remember reading that and thinking how horrible that must have been for her! Well, last night I had the same experience, with shower doors. This is why the importance is placed on safely glasses!
The first step to remove shower doors is to remove the shower doors from the track. They usually have some wheels on them and a little slot in the track where you can slide the wheels through it to unlodge the door. Be very careful while doing this. In my house in Omaha, I removed the shower doors and when I did it I pulled and pried and ripped the shower doors off the track no problem! In this house, probably because the doors are so old, I barely moved one and it shattered everywhere! I ended up with a mess like this:
I am just super thankful I moved my kiddo two minutes prior to this happening. He was in the sink part of the bathroom, barely divided by a doorway, playing on the floor. I at least had the forethought that the door could break and it would be a good idea to get him out of the way. I DIDN’T have safety glasses on (or shoes for that matter) and I am so surprised I didn’t end up with some glass in my eyes! Anyways, I always thought that shower doors were made with some sort of plexi glass or something shatterproof. Well, not in 1978, maybe the new ones are, but it makes you think twice about shower doors. Imagine slipping in the shower and hitting these doors and having them shatter on you! Well, anyways, everyone ended up OK in the situation. My little guy heard the bang of the door braking and was quite upset by the sound and I had a few cuts on my hands and feet. Other than the hour it took to clean up the dust like glass, we were all fine.
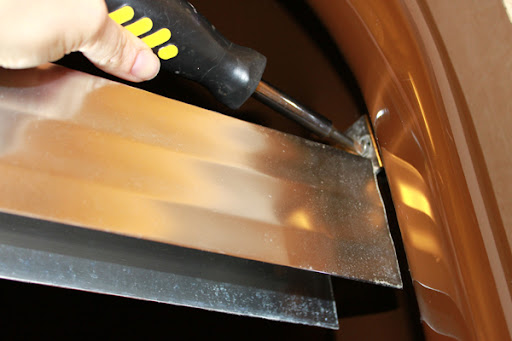
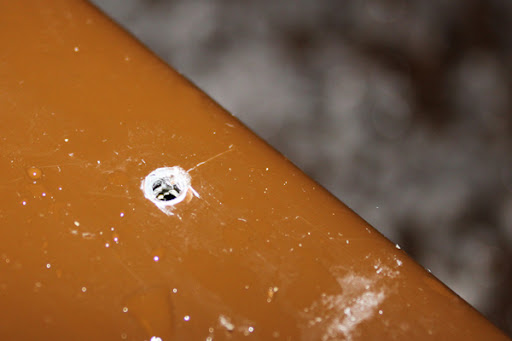
Anyways, back to the shower door removal….Once you remove the doors from the track, remove the hardware holding them in place. Usually it is just screwed in, so pretty simple. The house in Omaha had the doors tract caulked to the tub as well. If yours are, just use a blow dryer to heat up the caulking till you can remove the hardware. Then in combination of blow dryer and scraping with a putty knife, remove the caulking. It’s not fun and takes some time, but you will eventually get it all off. After the hardware is removed, you will be left with holes in your tub that look like this.
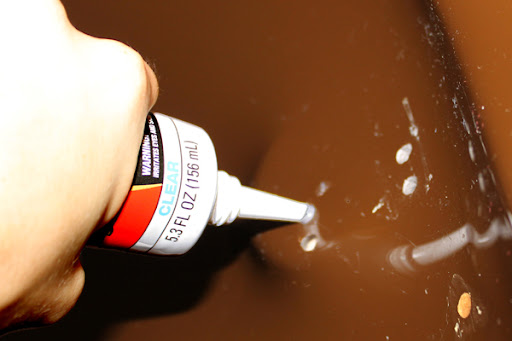
 You will need to fill the holes with some bath caulking. This will prevent ruining your tub with mold and mildew. If you have a white tub, like most normal people do, I would use white caulking. This tub is this awesome brown color and because they don’t make bath caulking in brown, I opted with clear.
 Fill the holes with caulking.
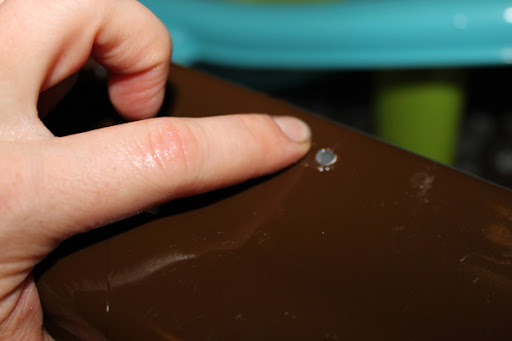
 Dip your finger in rubbing alcohol (this is a trick I learned from my mom!) and smooth out the caulking. The alcohol helps so that the caulking doesn’t stick to your finger and it smooths out the caulking nicely. (This also works great for caulking around a tub and counter tops.)
 Finally, hang your shower curtain and rod. I chose this plain Jane white shower curtain to help brighten up the room. The bathroom may still look pretty bad, you know brown tub and toilet and the AWESOME wood toilet seat, but at least I don’t have to look at those disgusting shower doors anymore!!
 Happy showering!!


