29 Jul How To: Install An In-Cupboard Pot Rack
About a month ago I wrote a post about organizing my kitchen and adding a pan rack was one of my ideas.
We really wanted to have a normal pan rack displayed in our kitchen, but the problem was the only spot available would be above the sink and that would block the view of our backyard. Browsing around on the internet I came across this in-cupboard hanging pan rack from a cupboard company (Ayr Cabinetry). I LOVED IT!
We have a cupboard just left to the cook-top that really doesn’t get used much, so I thought this would be a perfect addition to the kitchen and really aid us in the storage of our pans.I contacted the company and they told me they just purchased a pan rack (that normally would hang from your ceiling) from amazon and mounted in the cupboard, but they didn’t know how the carpenter had mounted it in the cupboard. After about a month of going back and forth I nailed down our plan of attack. Here is my little How To:
What you’ll need for this project:
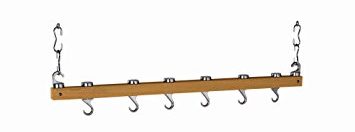
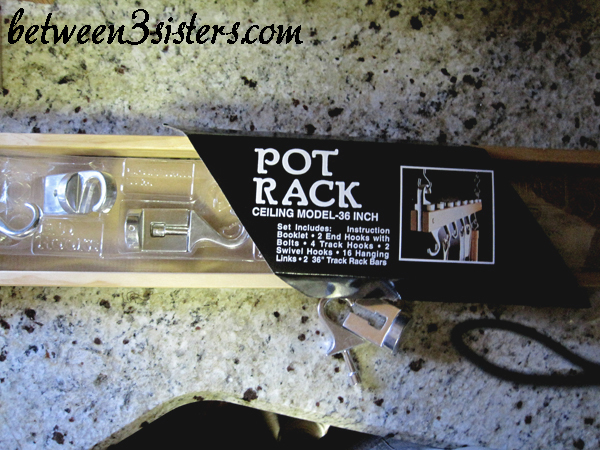
36″ inch Dual Track Natural Wood Ceiling Rack
Electrical Saw
Drill
(4) L-Brackets about 1.5″
Small Level
Stain (if you want it to match your cupboards)
8 screws (about 1/2″ to 3/4″)
I purchased this pan rack from amazon for $37.74 (pic is hyper-linked). You really do not need to purchase this rack, you can just use some 1″x2″ board and buy some pan hooks. I found the pan hooks, were about $6 each (6 times $6= $36, and I could get all the parts for just $1.74 more if I bought the rack)…so I thought purchasing this rack was the better route to go.
Next, you need to start out with measuring the width of your cupboard. We chose this cupboard next to the cook-top so that it was easy access for cooking.

Take the two wood boards out of the kit and cut them down to the width of your cupboard. Make sure that you measure twice! You don’t want them to be too small.
With the remainder of the board (the cut off part), cut a rectangle that is about 1.25″ long. This will be the “gap” between the two boards so that your hooks can slide back and forth.
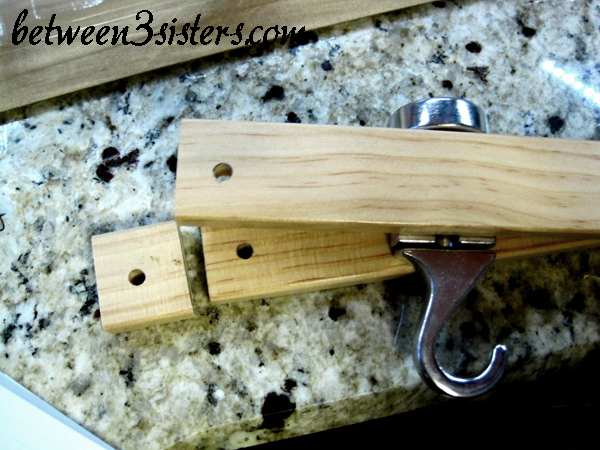
Clamp the boards together. It should be the long boards the outsides and the small 1.25″ boards in the middle on the ends. Drill holes in the boards equivalent to the size of the metal screws that came with the kit. It should look like the picture below.
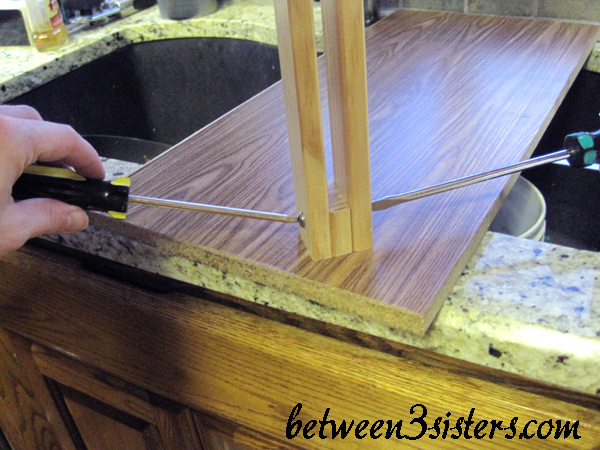
Attach the boards together with the metal screws that came with the kit.
At this point I chose to stain the rack so that it matched our cupboards. This is entirely up to you.
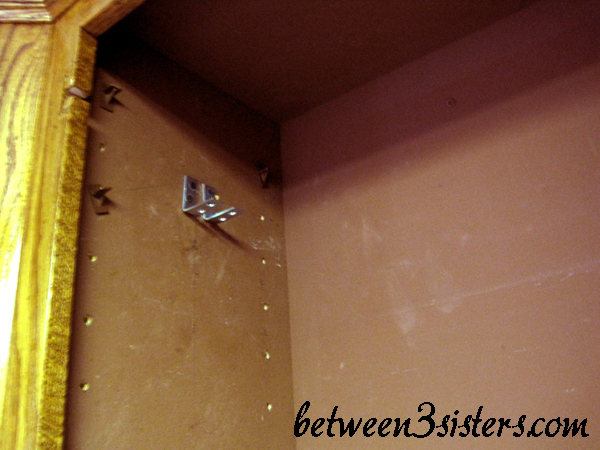
Next, measure where you would like your rack to hang. Make sure that you put the rack high enough for your tallest pan. Also, you need to make sure that the rack is in the center of the cupboard. Start out with marking just one side.

Attach two of the L-brackets in the area you have marked off as center one side of the cupboard. Place your wooden pieces on the L-brackets to line up the other side. Using your level, mark where to place the two remaining L-Brackets on the other side. Making this level is very important.
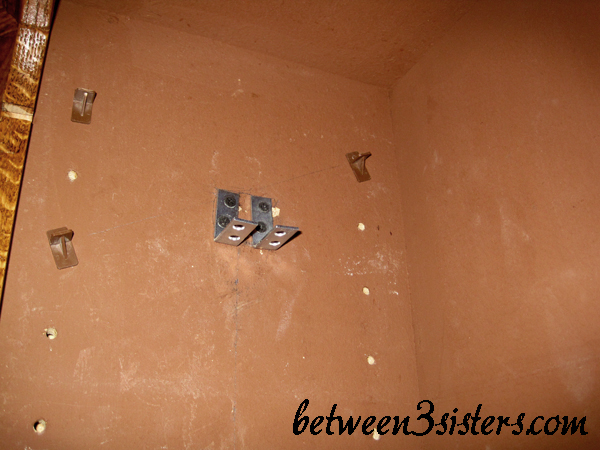
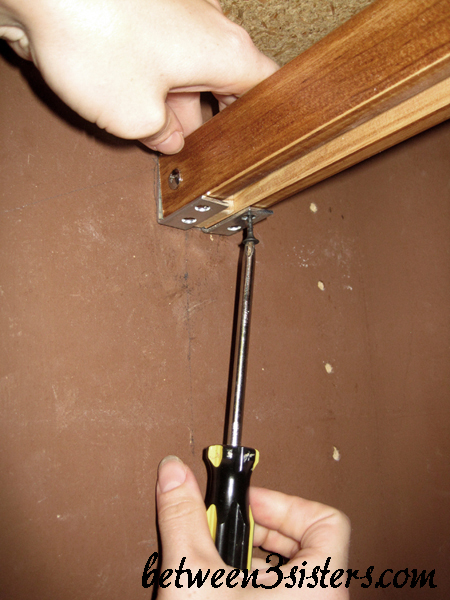
Once your L-Brackets are in place you can attach the wooden rack. Drill holes in the rack where you would like to place your screws. This should prevent the wood from splitting. Make sure to avoid hitting the metal screws that hold the rack together. We only used the outer holes on the L-Brackets. Use the remaining four screws to attach the rack to the L-Brackets.
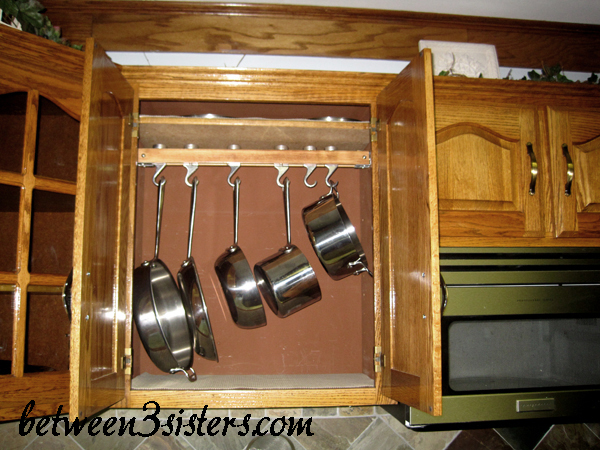
Insert the metal hooks in the pan rack and then adjust your shelf (if you have one) to the right height above the rack. We had just enough space for the shelf to be used to hold pan lids.

And wallah we are finished! The rack is in place and couldn’t look nicer! It’s just so handy to have the pans close at hand!
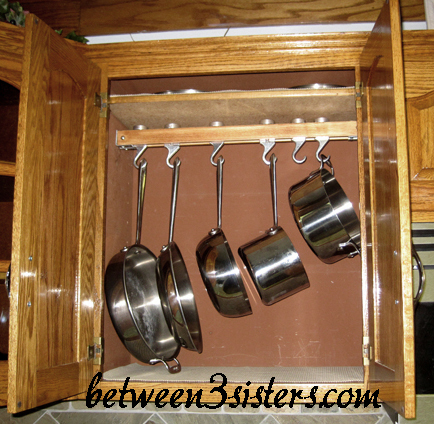
We are so proud of our little pot rack. It’s just another nice way to keep your kitchen organized and minimize the clutter!