

15 Feb Entryway Remodel (DIY Wall Coat Rack & Shelf) Complete
Last week I blogged about the death of my coat rack and how it was time for a new coat solution for our front entryway. Really a new front entryway.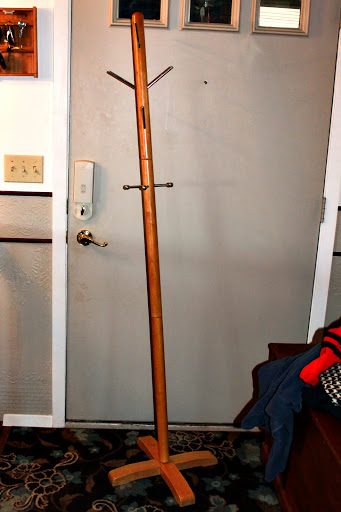
Since we moved in, my entryway has been in a major need of a remodel and I am happy to say it is finally complete with less than a day of work.
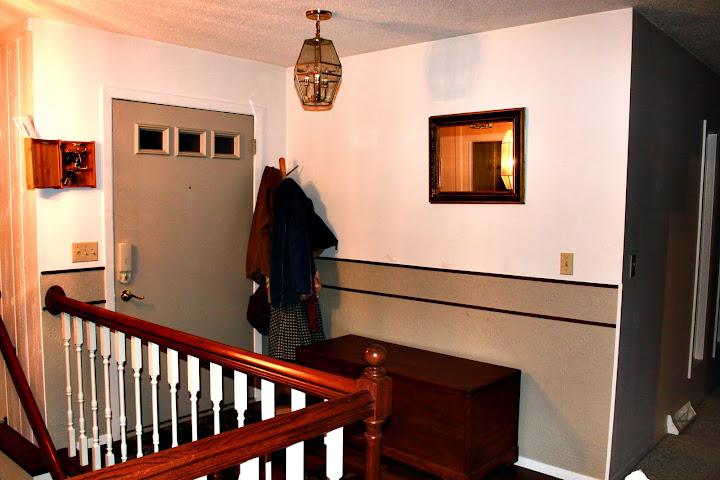
My entryway went from above to this:
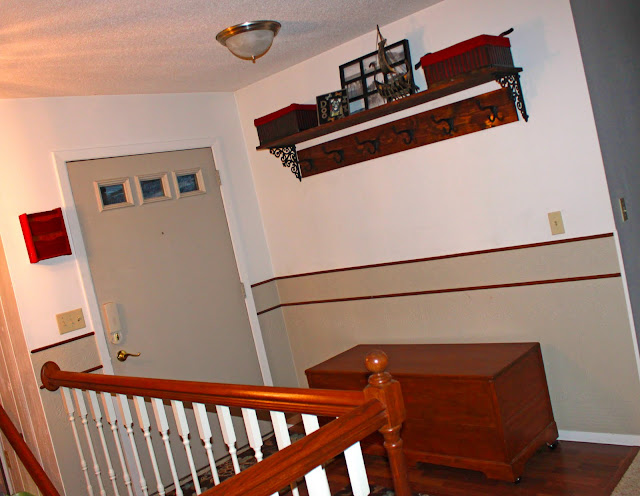 A vast improvement! Building this shelf was so easy, so I thought I could do a quick DIY on the subject.
A vast improvement! Building this shelf was so easy, so I thought I could do a quick DIY on the subject.Here is what you will need for this project:
Qty 2 L-Brackets = Hobby Lobby for $7.50 (50% off sale)
Qty 6 Hooks = Hobby Lobby for $2.00 (50% off sale)
Qty 1 1″x8″x8″ pine board = Home Depot $7.48
Qty 1 1″x12″x8″ pine board = Home Depot $14.98
Qty 1 1″x12″x8″ pine board = Home Depot $14.98
Qty 12 2″ screws (Quantity depends on number of holes in your L-brackets on the side that attach to the wall and how many screws you want to attach your coat rack to the wall with.)
Qty 20 1/2″ screws (Quantity depends on the number of holes in your hooks & the number of holes on your L-brackets that attach to the shelf.)
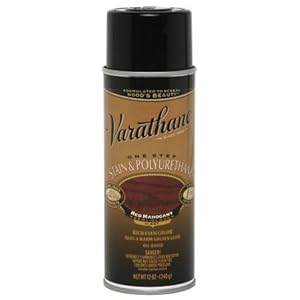
Stain & Polyurethane (I had left over on hand.)
Stud Finder
Level
Drill
I thought I would break down my timeline of making this shelf.
7:30am – Find studs with stud finder and determine the length desired for your shelf. You NEED to make sure that you install the shelf and the coat rack into studs. There will be points where I am sure this thing is stuffed full of coats and the last think you want is it to rip out of the wall.
 Once you mark your studs, determine from there how long to make your shelf. I decided to make my shelf 68 inches long and the coat rack 66 inches.
Once you mark your studs, determine from there how long to make your shelf. I decided to make my shelf 68 inches long and the coat rack 66 inches. 8:00am- The kiddo is busy watching Super Why, so I sneak downstairs (we put in a shop this winter) to cut my boards to the length I need.
9:00am – Nap time for the little guy, so I make my way downstairs to sand and stain my boards. (I bought boards in pretty good shape so I just need to use 200 grit on them to smooth them out a little.)
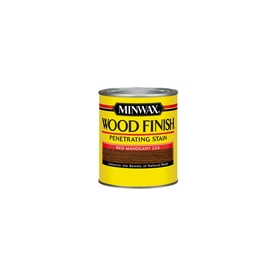
I used leftover stain from my Shoe Storage Bench in Red Mahogany that I just love the color of, so I decided to use that for this project. Plus, it matched my large toy box/storage bench that already resides in the entryway.
10:00am- Stain is dry, I wanted to have a light coat of polyurethane over the top to add a little protection. I had leftover Varathane (stain and polyurethane in one) from the Rocking Chair, so I used that for my top coat. (Have I mentioned how much I LOVE this stuff!) . It dries pretty fast and is easy to apply!
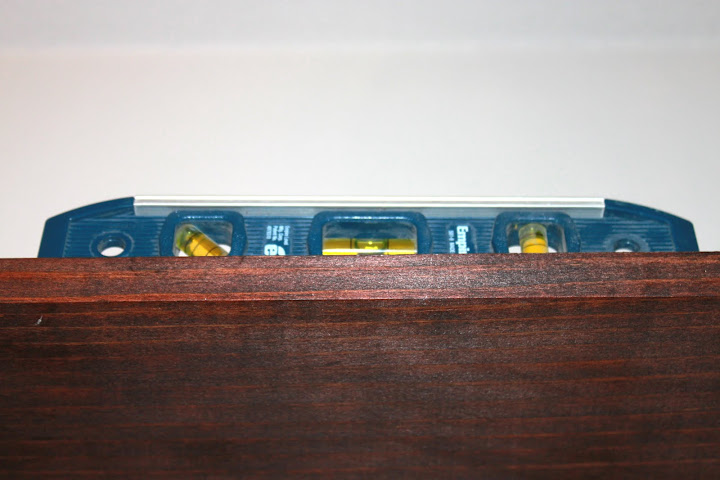
10:30am- Time to hang the brackets. To start, measure how high you would like your shelf and mark the walls on the studs. Line up the brackets and make marks for the drill holes. Before I made my marks I used a level to make sure my brackets were not tilting to one side or another.
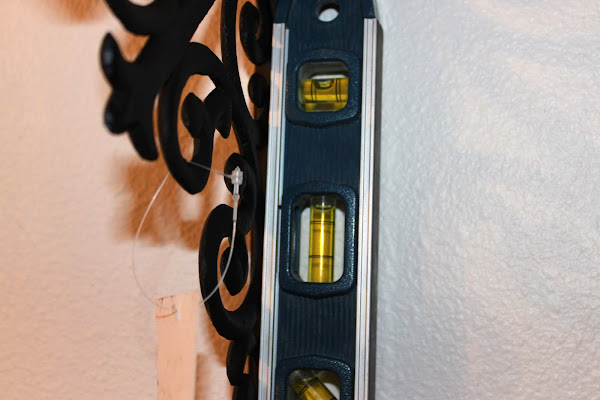 (As a side note, my brackets have 4 holes on each to attach to the stud. To make sure I was in the center of the stud, I nailed in a small finishing nail into the wall where I marked to drill hopes to make sure I would hit the stud. Good think I did this too, because one of them was only partially on the stud. The small holes of a finishing nail are easy to cover up and prevented me from having half of my bracket into the stud and the other just into the sheet rock.)
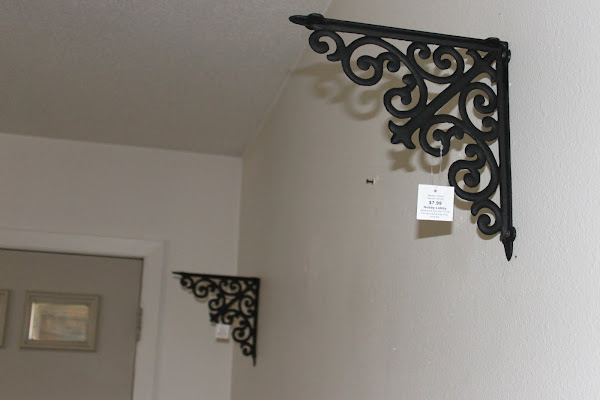
 Using your 2″ screws, attach your brackets to the wall with a drill. You will end up with two L-brackets attached to the wall like below.
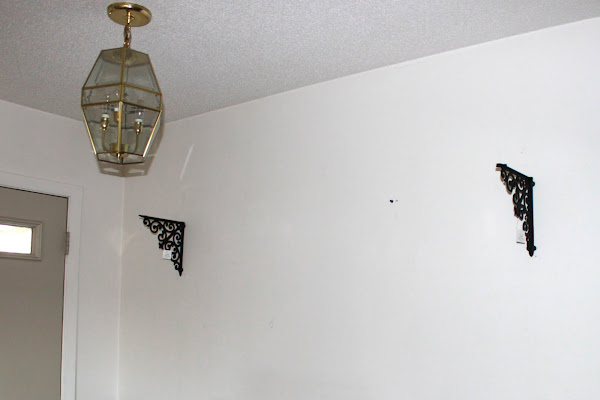
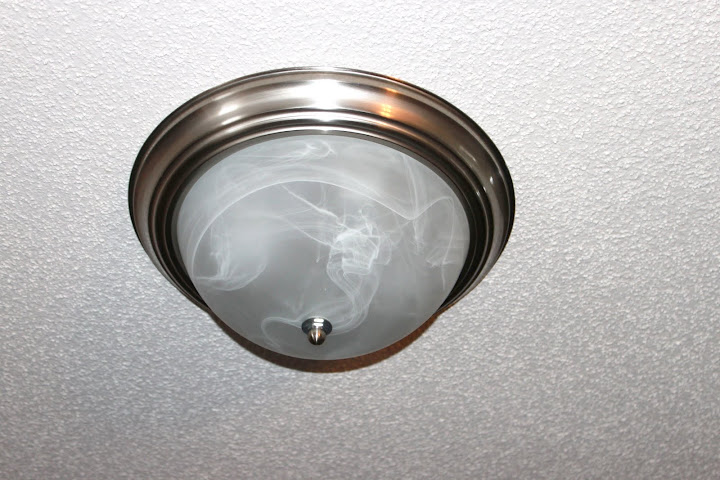
 But you will still have an ugly light fixture 🙁
 1:00pm- Time goes so slowly waiting for things to dry! The poly coat is finally dry and time to make sure my shelf is level. Place your board on the L-brackets and….
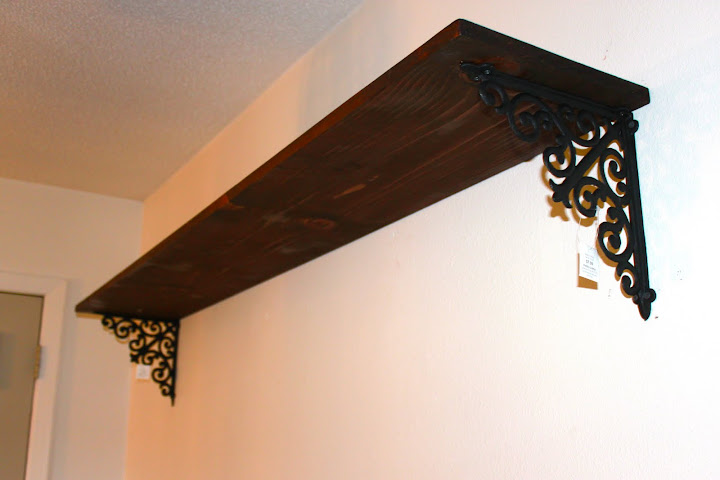 see how good you are at measuring. Luckily, I measured about 5 times so mine came out level. Now using your 1/2″ screws, attach the board to the L-brackets from the bottom.
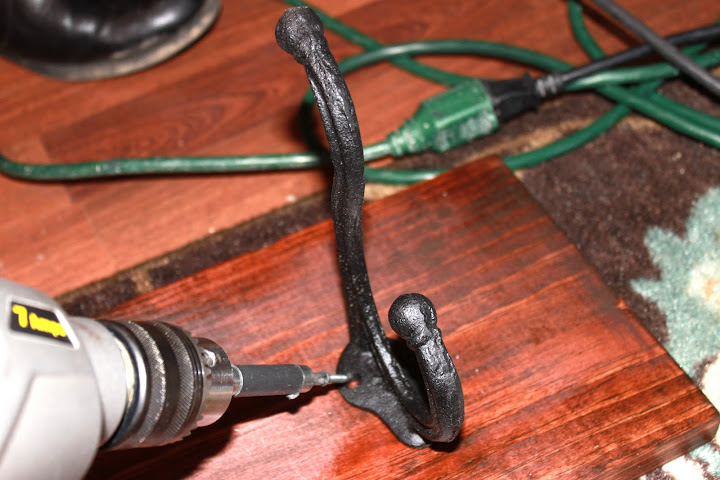
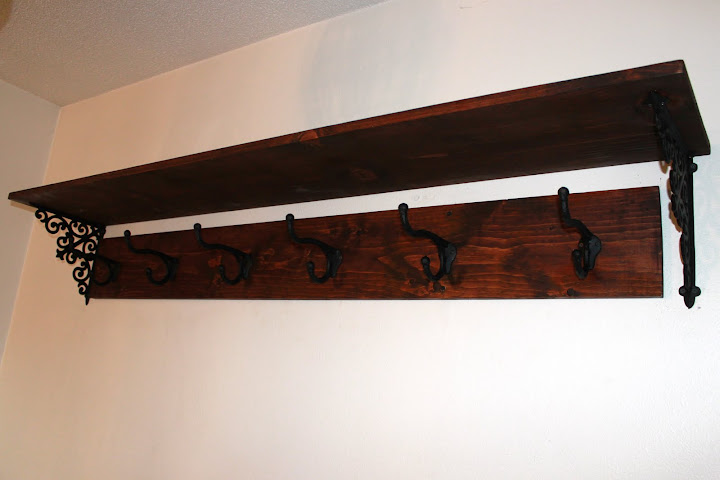
 1:30pm- Attach the hooks to the main coat rack board. The spacing of the hooks are up to you, but I decided (and have found it easiest) to start on the outsides and work my way in. I made each outside hook 3 inches from the edge of the rack and then spaced them evenly on the inside. Using the rest of your 1/2″ screws, attach the hooks to the board.
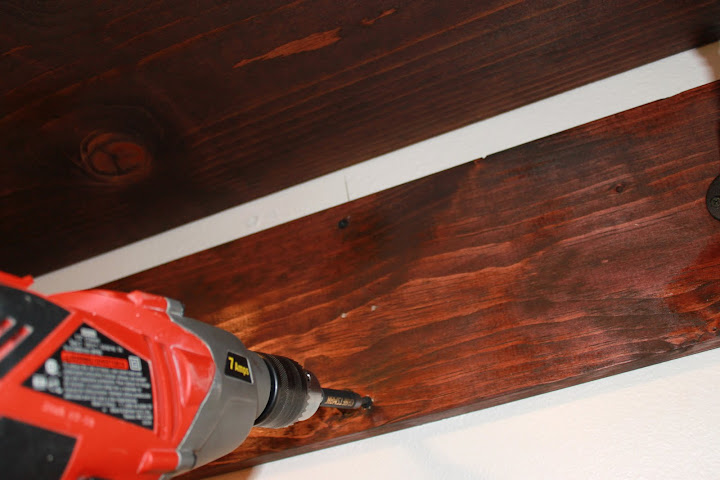
 2:00pm- Hang the coat rack on the wall. To do this, mark where the studs are under the shelf. This will be where you want to drill screws through your coat rack into the wall. I marked them with a line just above where I want to hang my coat rack. With some help, someone can hold up the shelf while you screw it in. I attached two screws, one on top and bottom, on two studs under the shelf. If you notice from the picture there is no hook. I removed the hook so I could drill the hole easier.
 Reattach your hook if needed, and enjoy your new shelf and coat rack!
 However, my job was not finished there. I had an ugly light fixture to still replace. Luckily, I found a new one for $8 on clearance at Menards and using my guide to hanging a light fixture, I installed a new one.
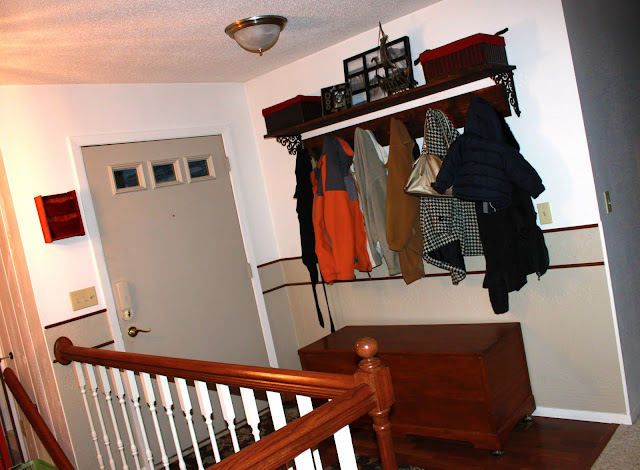
 Also, I found some baskets around the house, a few pictures, and one of my metal scupture to complete the decorating part. One basket holds hats and the other gloves. Though I can’t lie, I haven’t exactly filled the back frame yet. Those are the pics that came with the frame 🙂
 I love the way the entry way looks and it works for our coats.
And we have completely filled it up already!

Like this post?
Pin It
But you will still have an ugly light fixture 🙁1:00pm- Time goes so slowly waiting for things to dry! The poly coat is finally dry and time to make sure my shelf is level. Place your board on the L-brackets and….see how good you are at measuring. Luckily, I measured about 5 times so mine came out level. Now using your 1/2″ screws, attach the board to the L-brackets from the bottom.1:30pm- Attach the hooks to the main coat rack board. The spacing of the hooks are up to you, but I decided (and have found it easiest) to start on the outsides and work my way in. I made each outside hook 3 inches from the edge of the rack and then spaced them evenly on the inside. Using the rest of your 1/2″ screws, attach the hooks to the board.2:00pm- Hang the coat rack on the wall. To do this, mark where the studs are under the shelf. This will be where you want to drill screws through your coat rack into the wall. I marked them with a line just above where I want to hang my coat rack. With some help, someone can hold up the shelf while you screw it in. I attached two screws, one on top and bottom, on two studs under the shelf. If you notice from the picture there is no hook. I removed the hook so I could drill the hole easier.Reattach your hook if needed, and enjoy your new shelf and coat rack!However, my job was not finished there. I had an ugly light fixture to still replace. Luckily, I found a new one for $8 on clearance at Menards and using my guide to hanging a light fixture, I installed a new one.Also, I found some baskets around the house, a few pictures, and one of my metal scupture to complete the decorating part. One basket holds hats and the other gloves. Though I can’t lie, I haven’t exactly filled the back frame yet. Those are the pics that came with the frame 🙂I love the way the entry way looks and it works for our coats.And we have completely filled it up already!
Like this post?
Pin It