19 Feb Concealing Under-Eye Circles in 3 Easy Steps
It seems like I’ve been battling dark circles ever since I started wearing makeup. Over the years I’ve tried numerous concealers and eventually found my match in MAC’s Studio Finish Concealer. You can read all about my undying love for it here.

However, I wanted to write an update because I’ve developed a little under-eye circle “routine” that I am very pleased with. It’s a three step process that can be duplicated with either drugstore items or high-end products.
Step 1: Brighten
I’ve tried numerous neutralizers and different correcting shades but brightening the under-eye area seems to provide the best foundation for treating dark circles.
The product I use for this step is Maybelline’s Instant Age Rewind Erase Dark Circle Treatment Concealer (holy moly, what a mouthful!) in the shade, you guessed it, “brightener” (the pink-ish shade). If you prefer a high end alternative, try Benefit’s Eye Bright.

To use the product you just turn the base (and it makes that click-click-click sound) and the liquid comes up through the sponge applicator. From here you can just dab it on under your eyes in a triangle pattern (one corner at your inner eye, the second corner at your outer eye, and the third corner pointing down towards the tip of your cheek) and blend. Quick tip: after using this product for a little while I realized that the sponge soaks up a TON of the makeup. So in my effort to be cost effective I ripped off the sponge applicator. Now I just need a couple clicks to get the amount of product I need. I apply it right to my fourth finger and tap and blend it under my eyes.
Step 2: Conceal
For this step feel free to substitute your favorite concealer. I of course turn to my MAC studio finish. The price is a bit steep at $18.00 but as I’ve explained before, I used to buy concealer that was $7 a pop and I would have to buy it probably once every 1-2 months. This concealer lasts me a YEAR at a time, covers blemishes as well, and is more than cost effective considering how frequently I was having to buy drugstore concealer.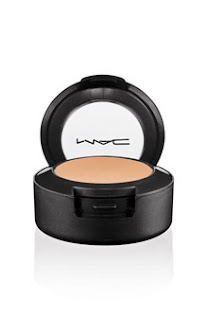

I simply dab my fourth finger into the pot and then pat it under my eyes and blend. I think one of the keys to this is to remember that more product does not mean better coverage. A lot of people don’t like the MAC studio finish for under-eye coverage but I find using just a little goes a long way and as long as you don’t cake it on. Love it!
Step 3: Set
For this final step I use ELF’s Studio High Definition Undereye Setting Powder. This lovely little product clocks in at $3.00. Woo hoo! If you’re looking for a high-end option I’ve heard good things about Bare Minerals Well-Rested SPF 20 Eye Brightener.

To finish off the coverage I use my Sigma F86, dip it into the pot, tap off the excess, and dab under my eyes (from inner corner to outer). I find this last step really prevents that annoying crease under the eyes and sets my under-eye makeup for the day.
Truth be told, I don’t do this every day (because sometimes I’m lazy, obviously) but I do find this is the best way to deal with my dreaded dark circles and thought I would share it with you guys!
Do you have any tips for concealing under-eye circles? Share below!
~Christi