24 Jul How To Add Bun Feet To Hollow Bottom Furniture
Disclaimer- The title of this blog is really the best one I could come up with. I am not exactly sure if the turn “hollow bottom furniture” is correct turn to describe furniture with a bottom like my hutch, but until someone emails me and tells me otherwise, that is what I am going to call it. Enjoy!
For months now I have been on the search for a hutch for my china. Our new house is awesome, but one not so awesome thing about it is that our open floor plan might be a little too open. I mean, I have no walls to put things on! I’ve been wanting a hutch to put my china in but our largest wall space is about 33 inches, so finding a hutch for my china to fit on a wall that small has been a bit of a task! Finally for our 10 year anniversary my husband said he would buy me a reclaimed hutch I found at a local DIY furniture shop. It fit the size of wall I have, but it was only 28 inches wide and 60 inches tall. I envisioned something larger to maximize my space as much as I could. After looking at this super cute hutch, I thought I can do this myself and maybe, just maybe I will find one that is the exact size I want.
I spent the next day going to every used furniture and antique shop in town. It was wonderful!!! I love looking at old junk and with a coffee in hand, I ran all over town in search for that “one” piece. Here is what I found:
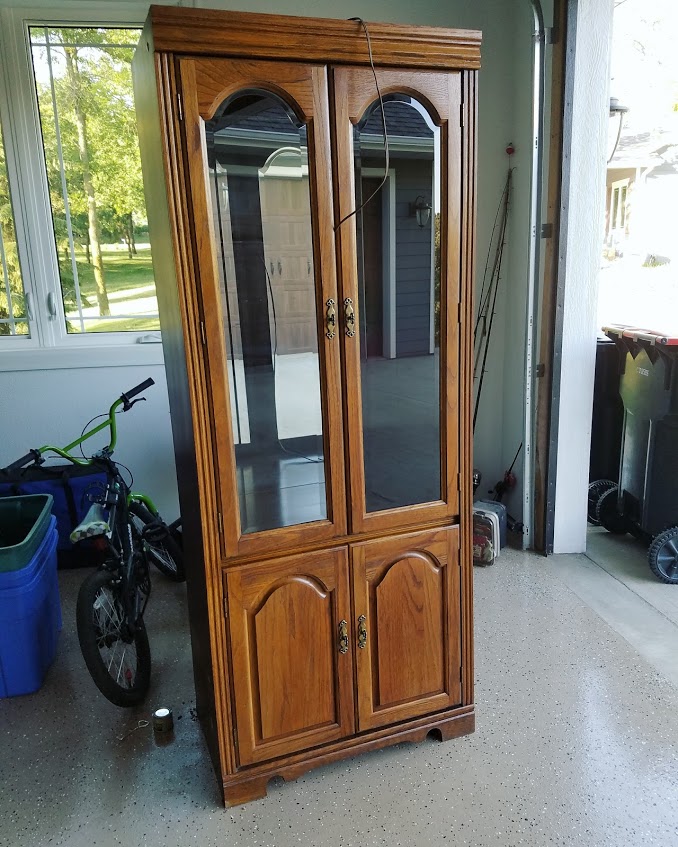 I know, ugly right?!? Actually, it’s not that bad. This looks like it would have been some awesome piece in the early 90s, during the height of shiny brass knobs and golden oak. Pretty sure my parents had bookcases that would have matched this!
I would love this blog to be the reveal of my hutch but today I focused on one main task, putting bun feet on this hutch. Now why do I need bun feet? There are a few reasons: 1. They are cute. They add a little character and decoration. 2. I have an air return on my largest wall of 33 inches. I could just put this hutch in front of it, but I would hate to make my furnace not run as efficiently as it should.
I originally purchased four of the Greco Roman Square Tulip Bun Foot from Amazon

{source}
And these leg mounting plates to attach them:

{source}
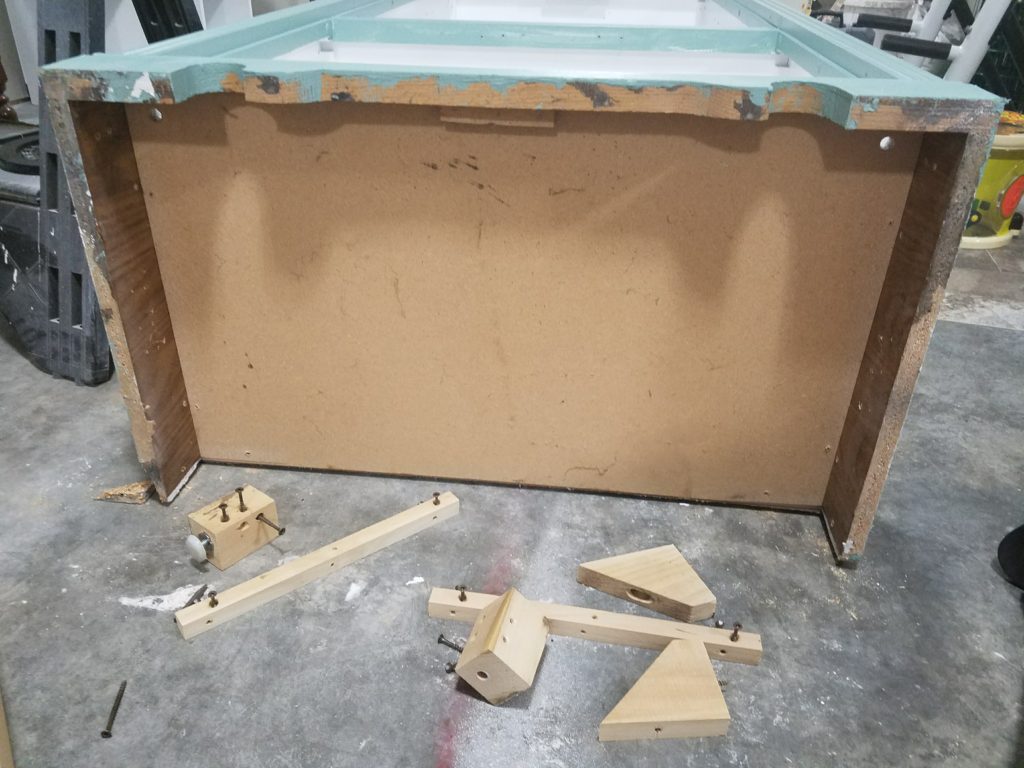
My husband helped me flip over the hutch and to my disappointment, this is what it looked like:
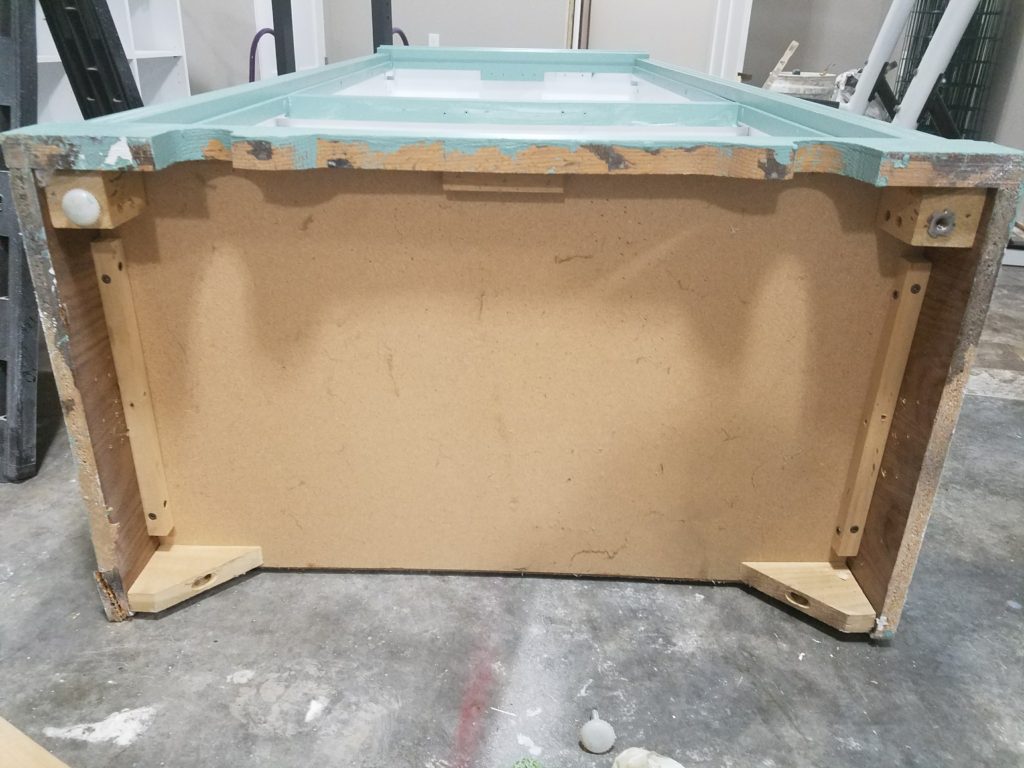 Absolutely no place to install the plates. I googled somethings and just couldn’t find any video or blog about how to install bun feet the way I wanted to on the bottom of my hutch. I went to my husband, “HEELLLPP!” He just rolled his eyes (he’s not a fan of my projects), looked at my hutch, and we talked out the options. We knew the plates wouldn’t work, because there was no way to make the feet line up with the corners, so he gave me this idea. Since I couldn’t find any blog where someone had this issue, I decided to write this one myself. I hope it helps someone out there!
First I made sure my feet were painted and ready to go.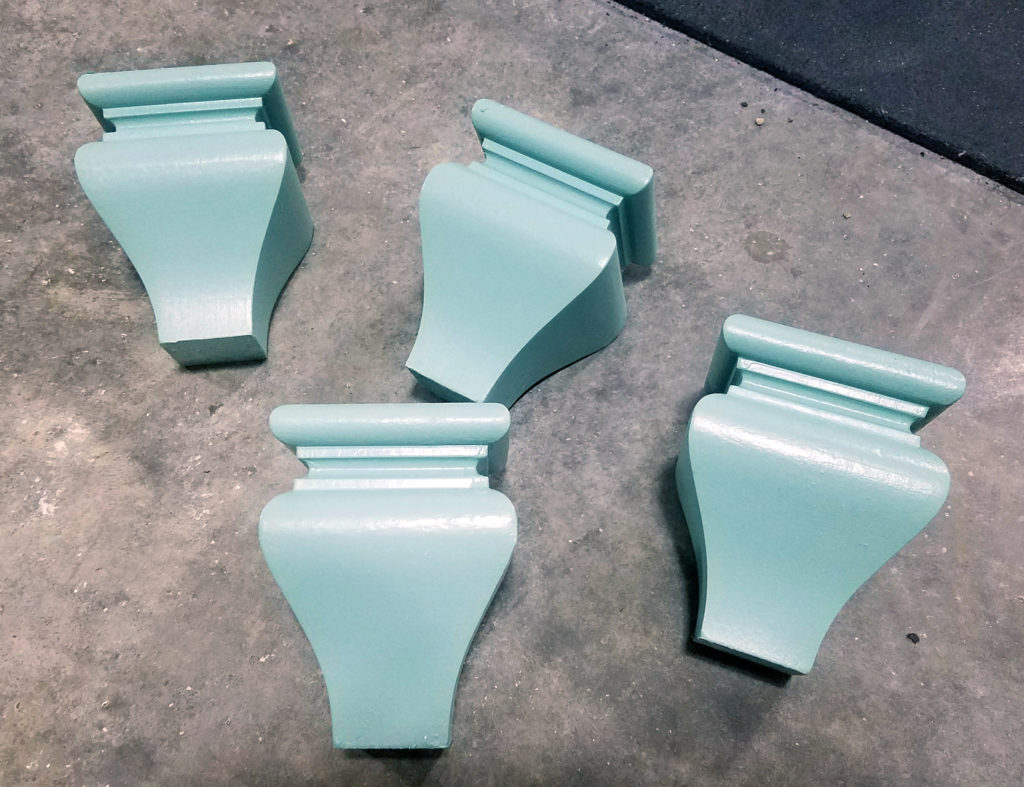 You’ll need some other supplies
- Drill
- 40- 2.5″ screws (or whatever length with go through a 2×4 board and into your furniture without poking through)
- Drill bit for the screws you have
- Wood Glue
Remove all hardware from base. (Also, I might add, touch up the paint if you want, I did.)
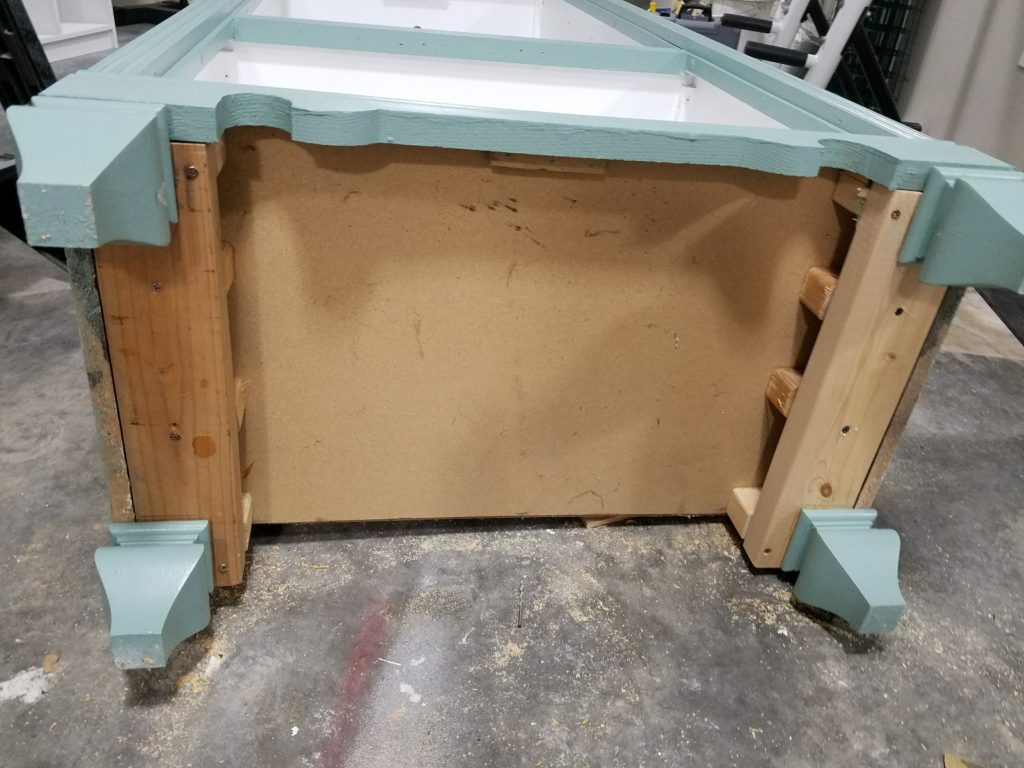
 You need to have something to attach your bun feet to, so we are going to create a 2×4 platform that will allow your feet to be flush with the sides of the piece of furniture. Place a 2×4 (cut to the depth of your base) flush with the corners of the hutch and measure the distance. Mine was about 2 inches. Cut four 2×4 boards to that size.
 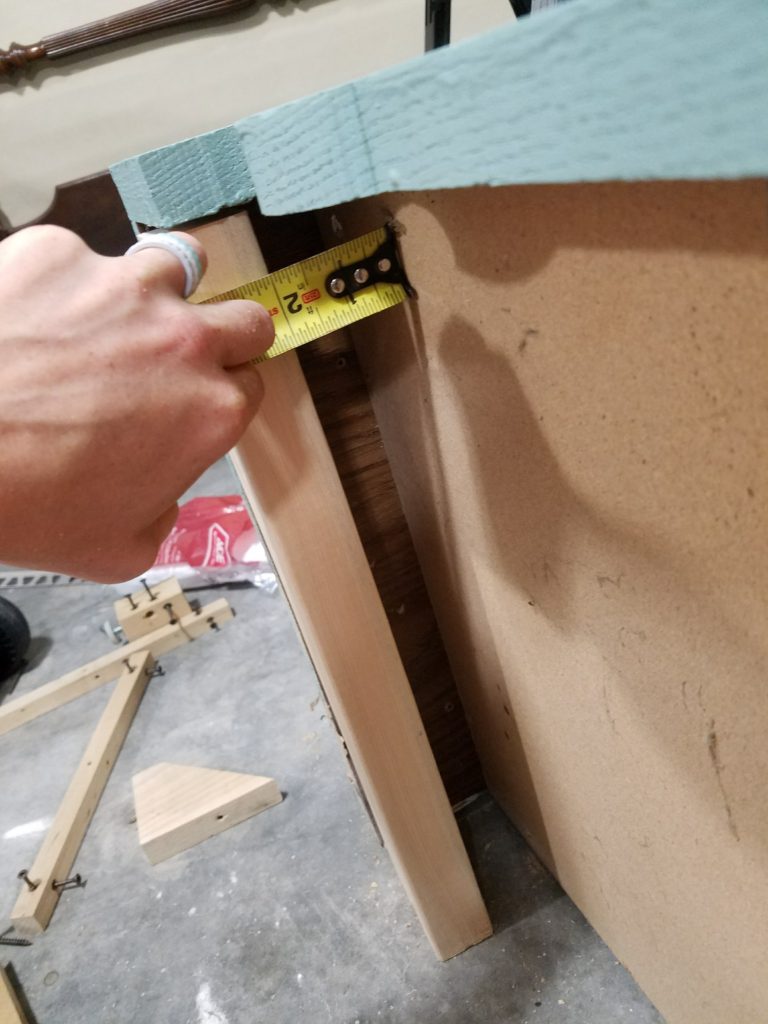 Each small cut 2×4 needs to have two holes drilled in it.
 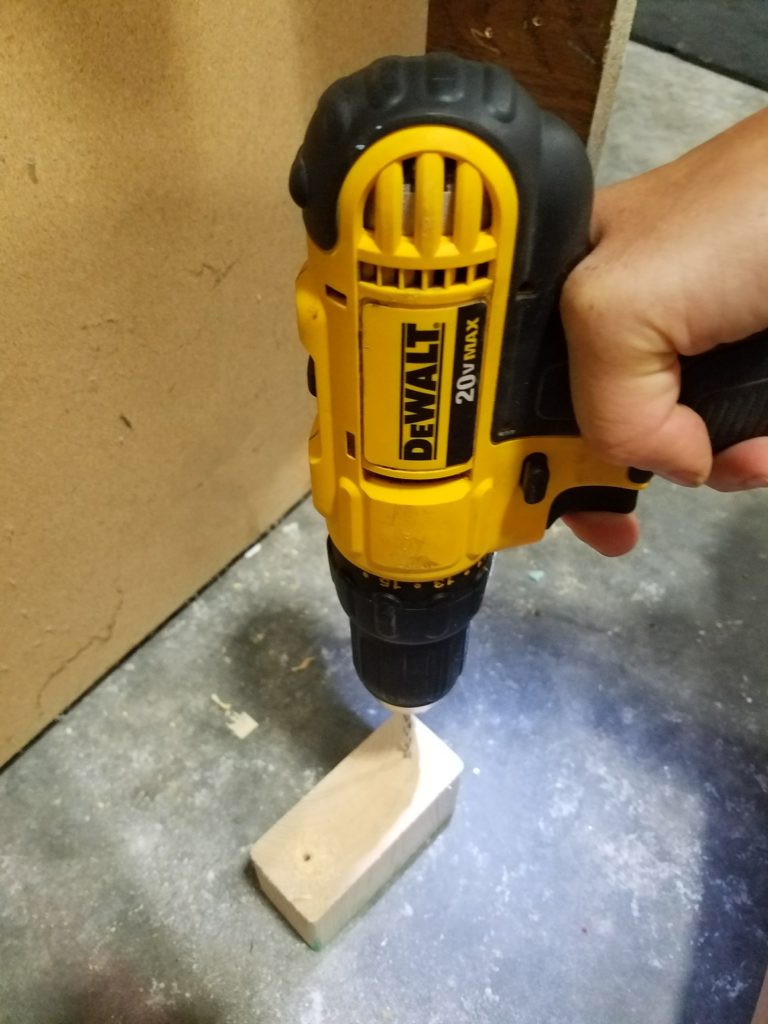 Line up you small 2×4 with the top of your corner and screw it in place. Do the same for all four corners.
 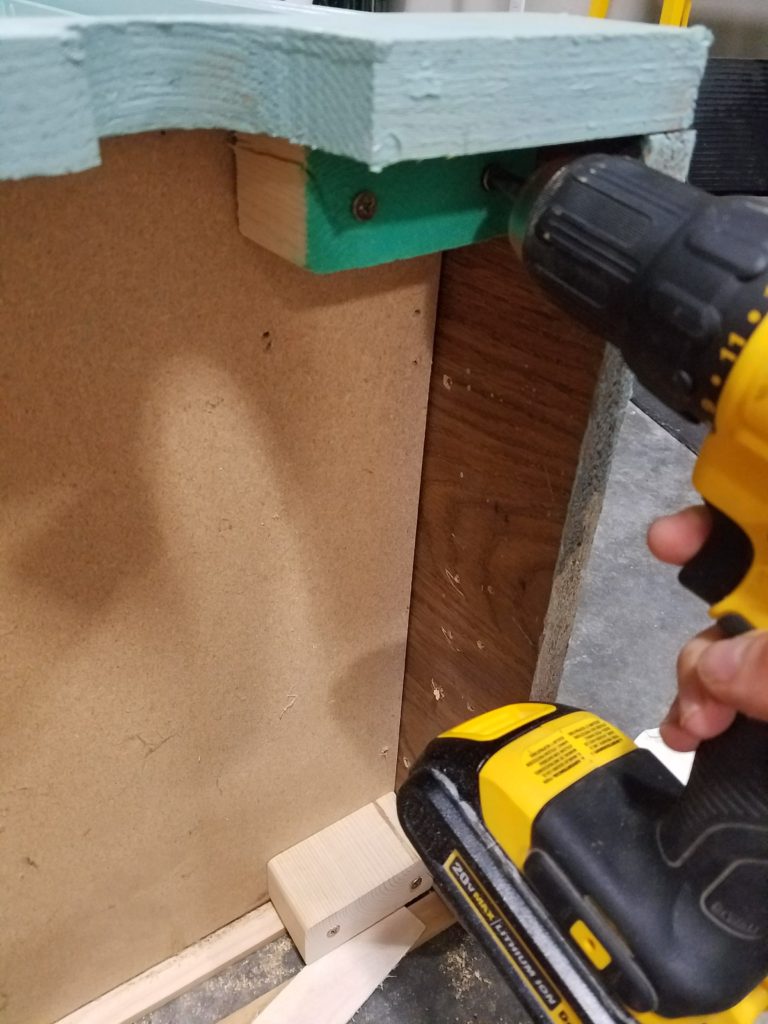 After you get the four corners in place. (Do the corners first in case removing any of the original supports causes you base to move.) Screw into place your two other small 2×4 in the middle of each corner (to provide more support).
 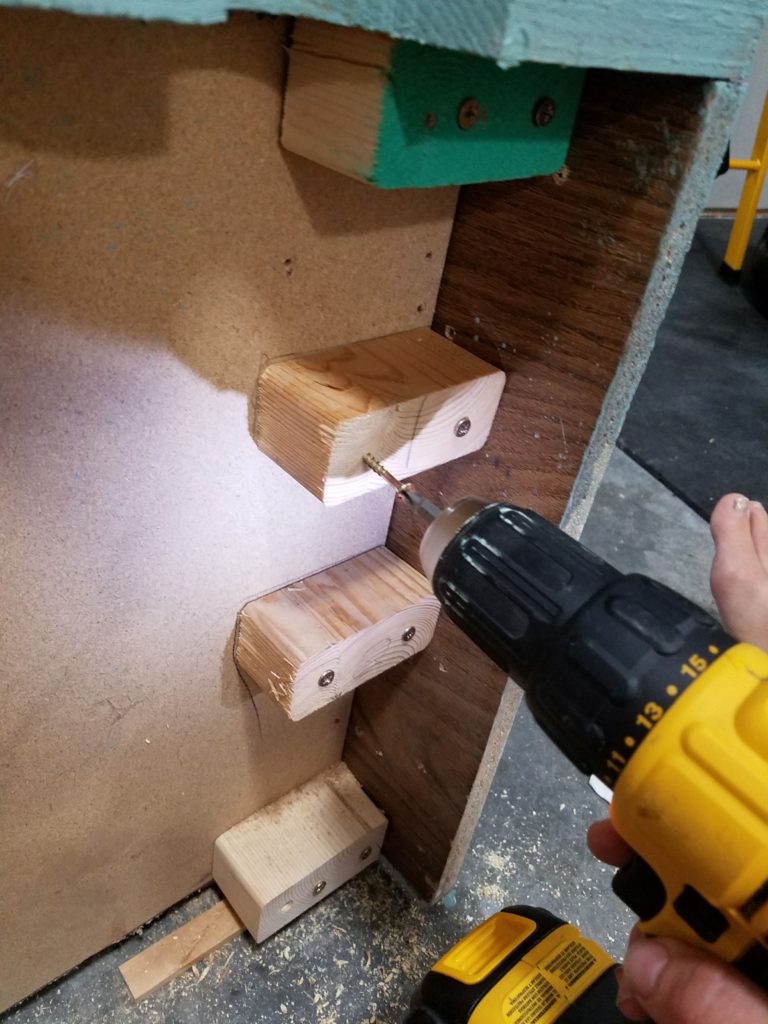 Place you long cut 2×4 into place over the 4 short boards and make sure foot is flush with corner and that there are no gaps.
 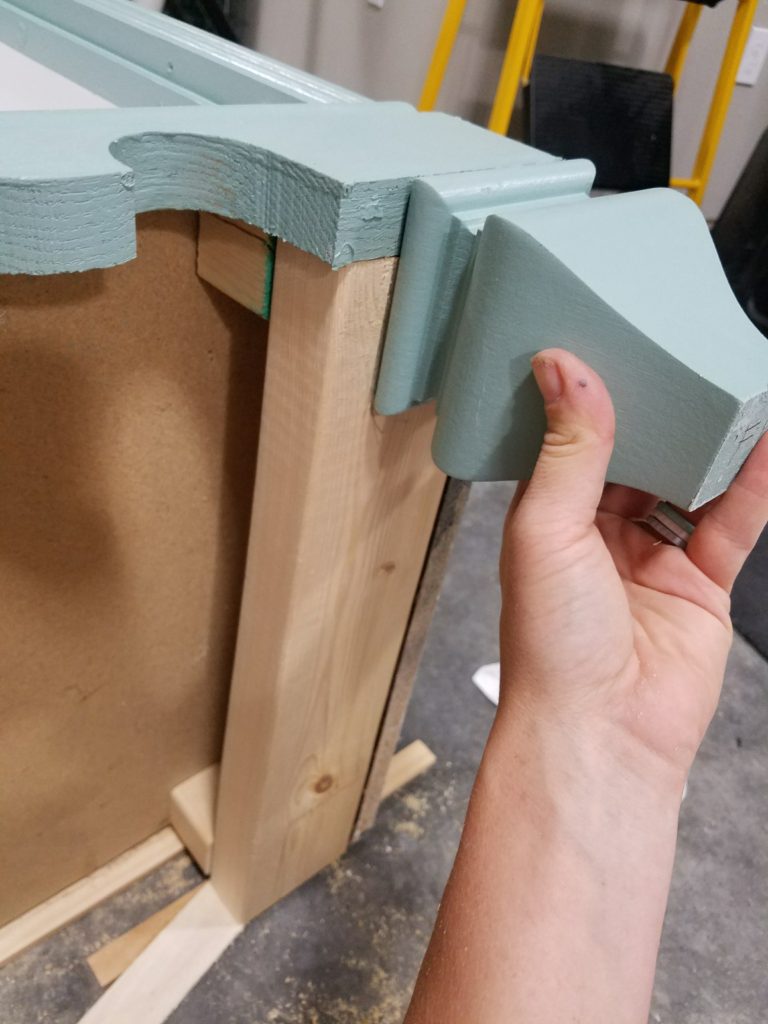 Using a pencil, draw on your 2×4 where your foot should be placed.
 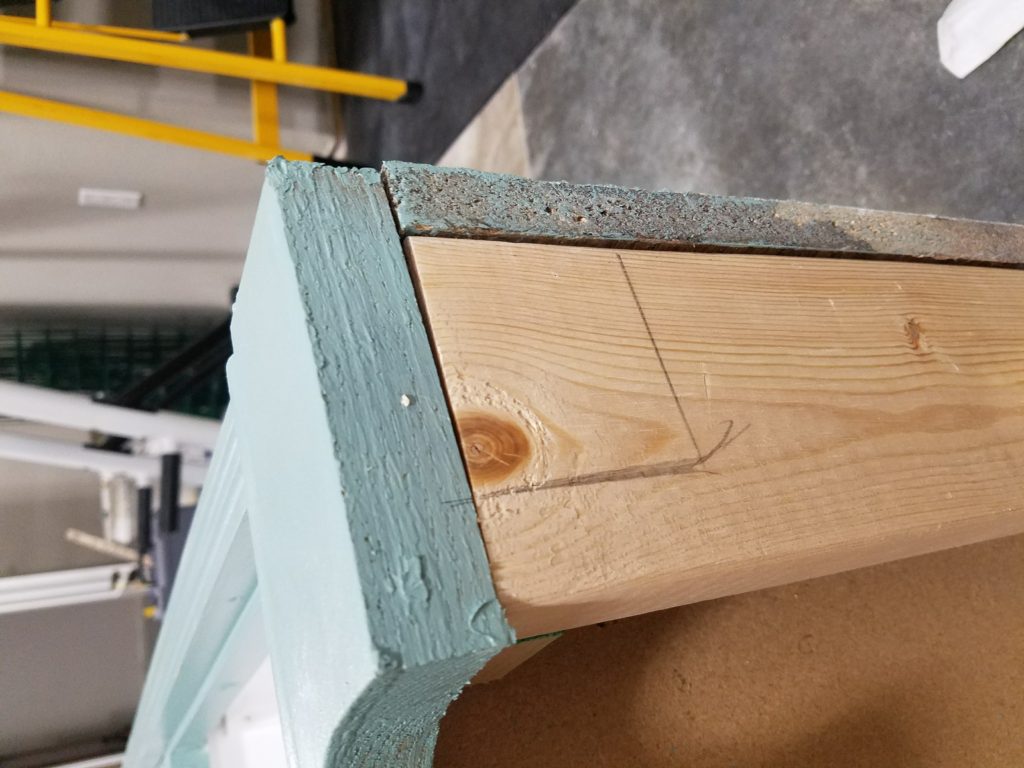 Now inside that box, determine where your screws to attach the feet need to go. Drill a hole there and make sure it comes out the other side.
 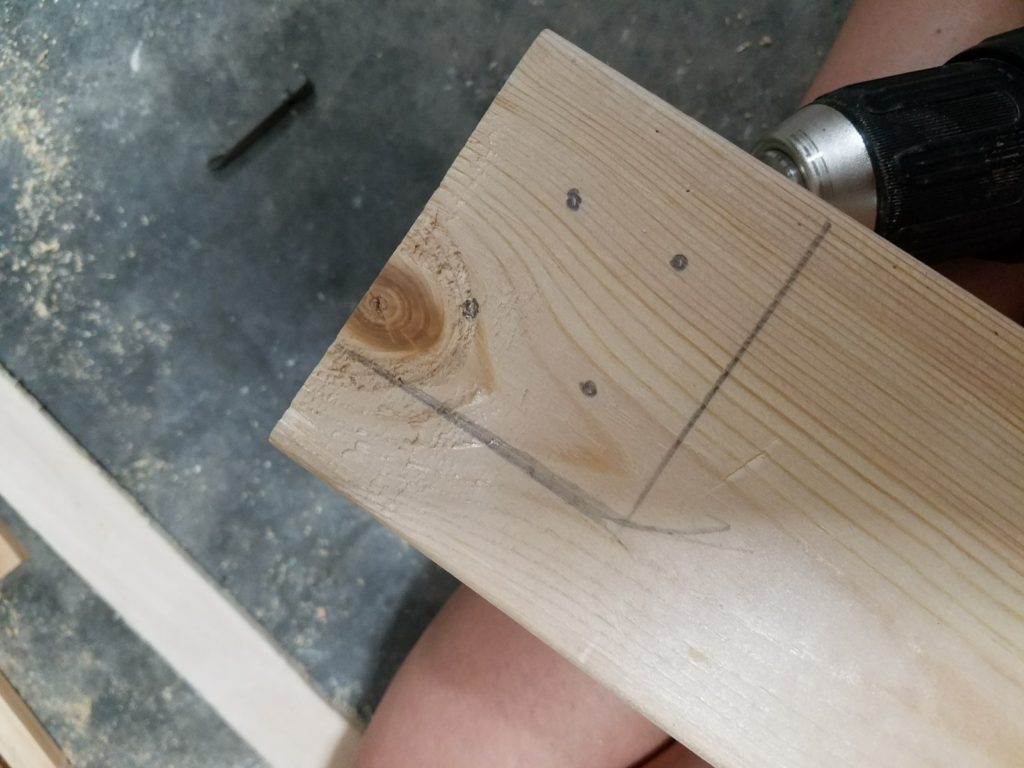 Once your holes are drilled apply glue inside the box and put the foot in place. Let dry until glue is set.
 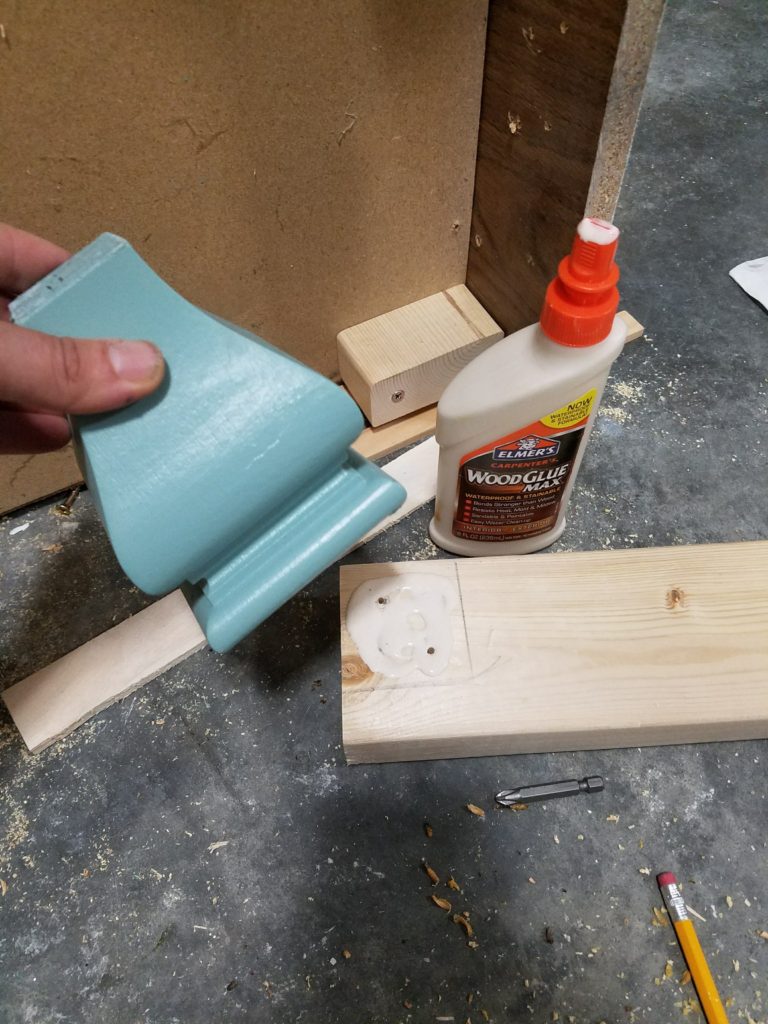 You should have something that looks like this:
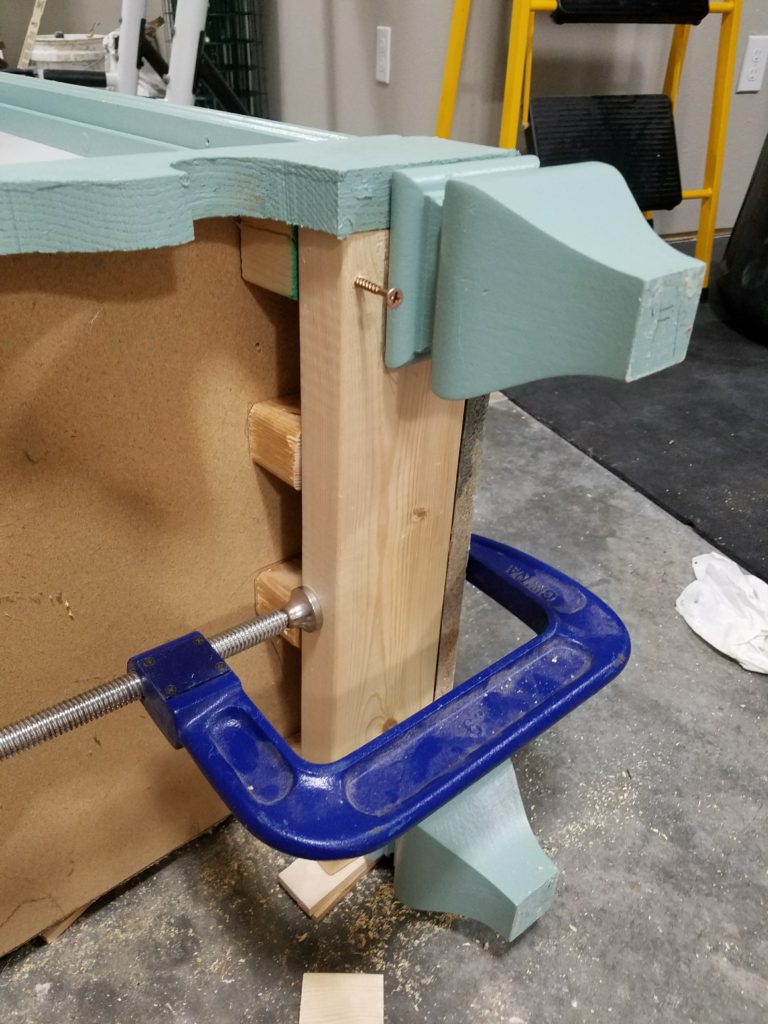
 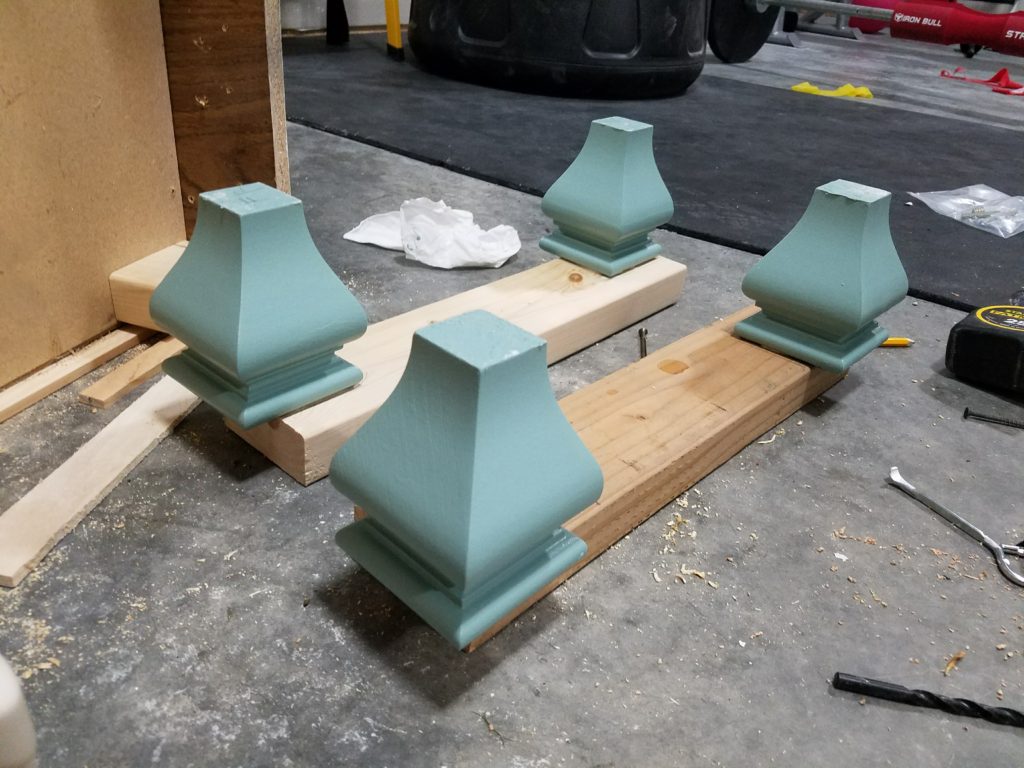 Using a clamp, place your 2×4 with feet attached in place. Drill top and bottom into small boards in corners.
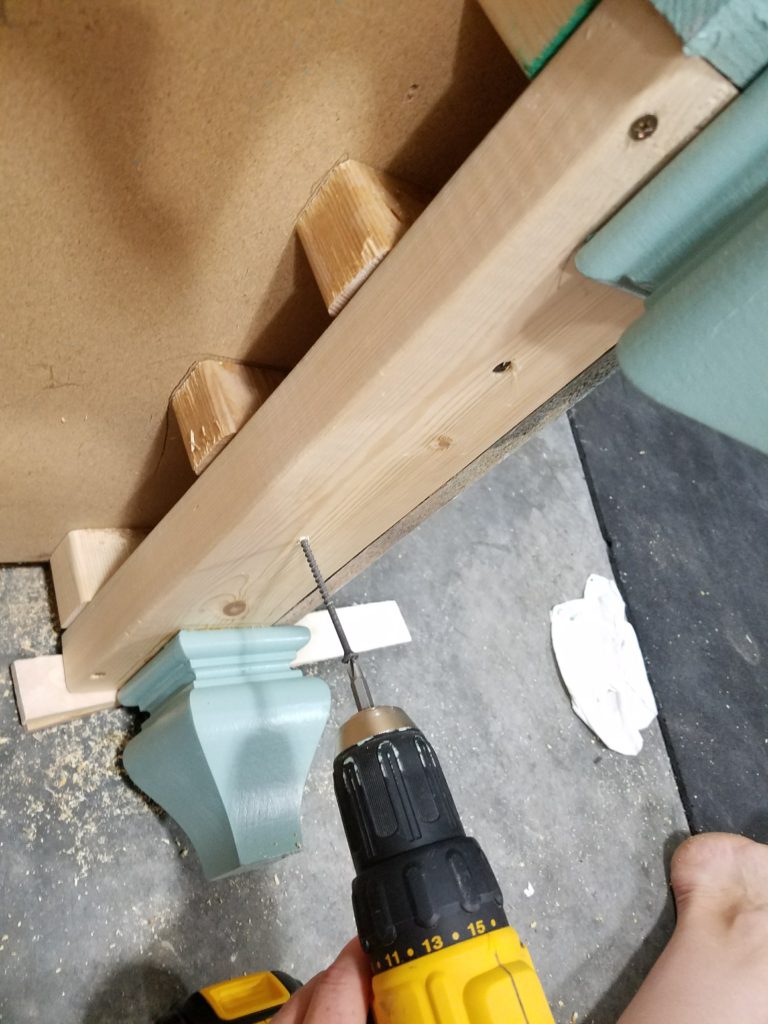
 Also, make sure you add more screws into the center boards. This will help hold the feet on better and create support in the middle.
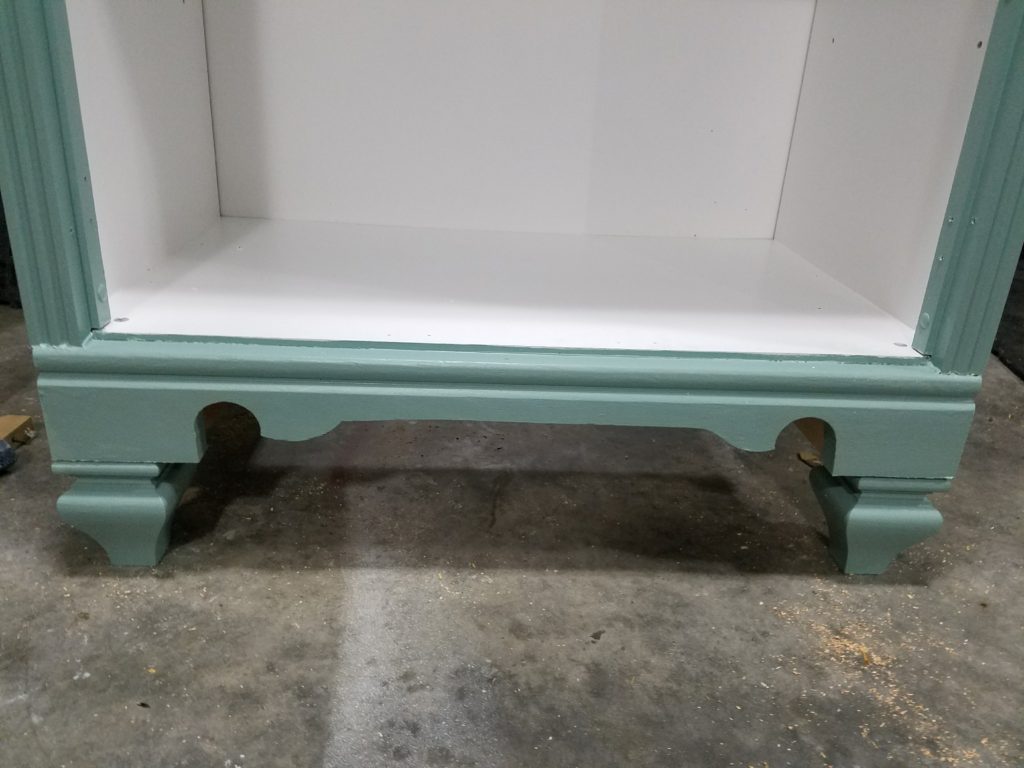
 Once you are done with both sides, sit back and admire your work. The real test comes when you put your furniture upright. Be very careful not to put too much weight on the back legs, they could break off. I had to call the muscle in to help me lift this up correctly (a.k.a. my husband.)
 Aren’t they awesome!! It adds so much more character to this little hutch of mine!
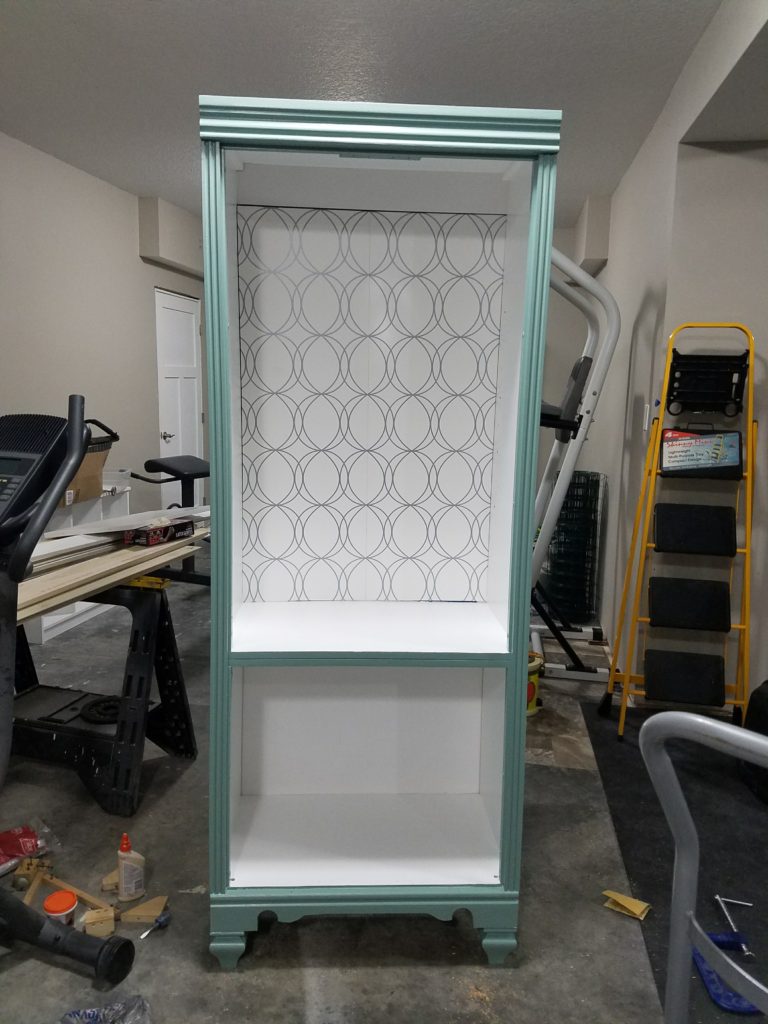
 Before I go, one last sneak peak on my progress so far. I can’t wait to post about this when I get it all completed!