


30 Jan DIY Tea Organizer
This posts may contain affiliate links to Amazon, which means that we may earn a small commission from some of the links to products within the posts.
It’s the middle of the winter for those of us who live in a cold northern state and for many of us that means tea time! I love tea. I love tea because it keeps me warm on those super cold days, makes me feel better when I am sick and honestly keeps me from snacking on garbage most of the day.
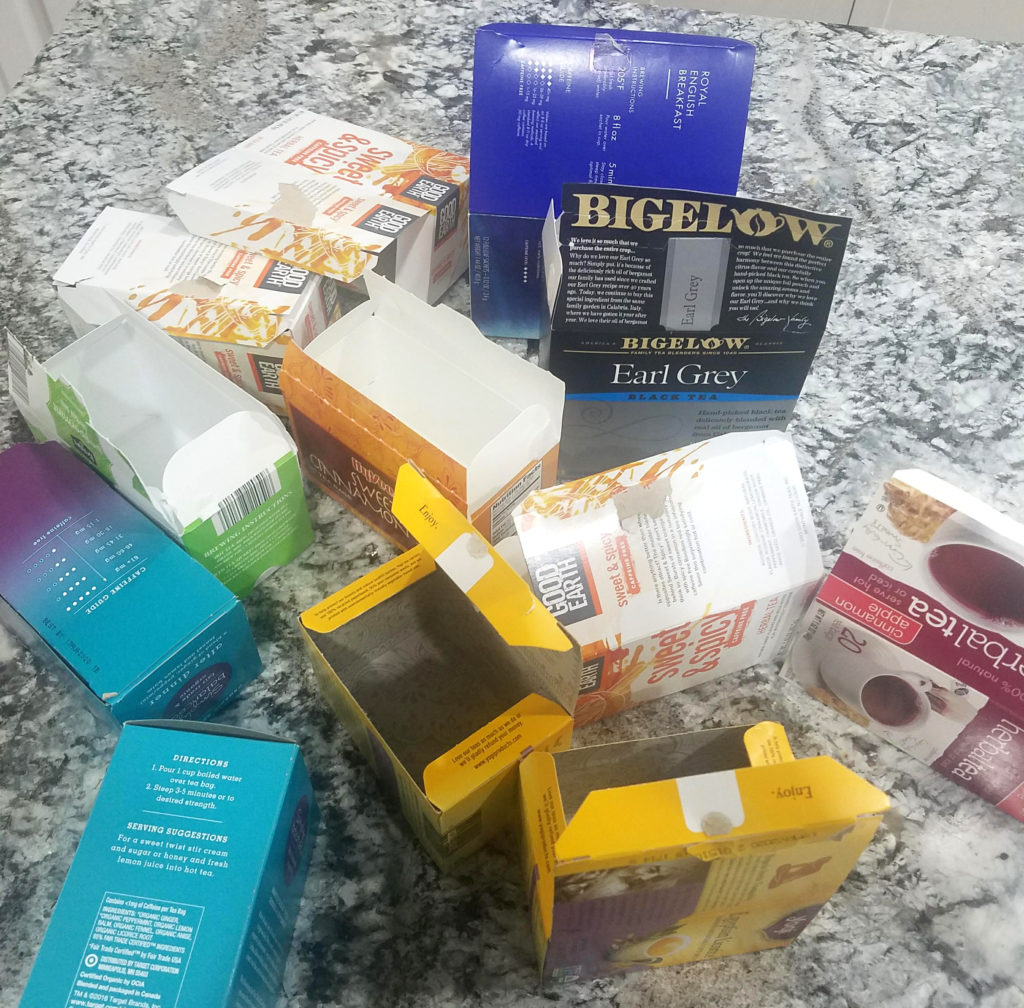
With the love of tea comes lots of kinds, lots of shapes, lots of colors….and lots of clutter. Tea has taken up entirely WAY too much of my pantry for too long. So I am going to show you how I turned this:
Into this:

You will need a few things to get this organizer started:
- 1 Sterilite 3 Drawer Plastic Organizer
- 1 large piece of foam board
- Hot glue gun
- X-ACTO Knife or Carpenters Blade
- Measuring Tape
To start, measure your height, length and depth of your drawers of the Sterilite 3 Drawer Plastic Organizer. Mine were 13.25″ long x 12.5″ wide x 2.5″ deep.
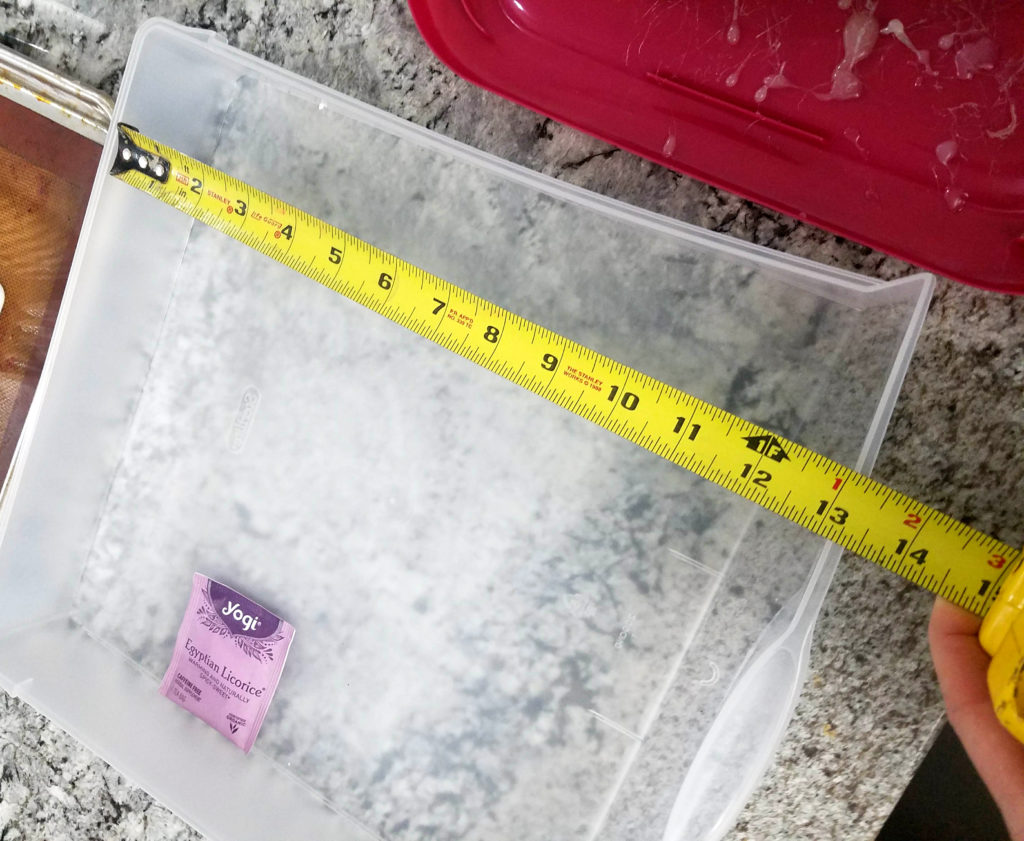
Measure the size of your teabags or containers. Use this size to determine how many spaces you want to make for each drawer.
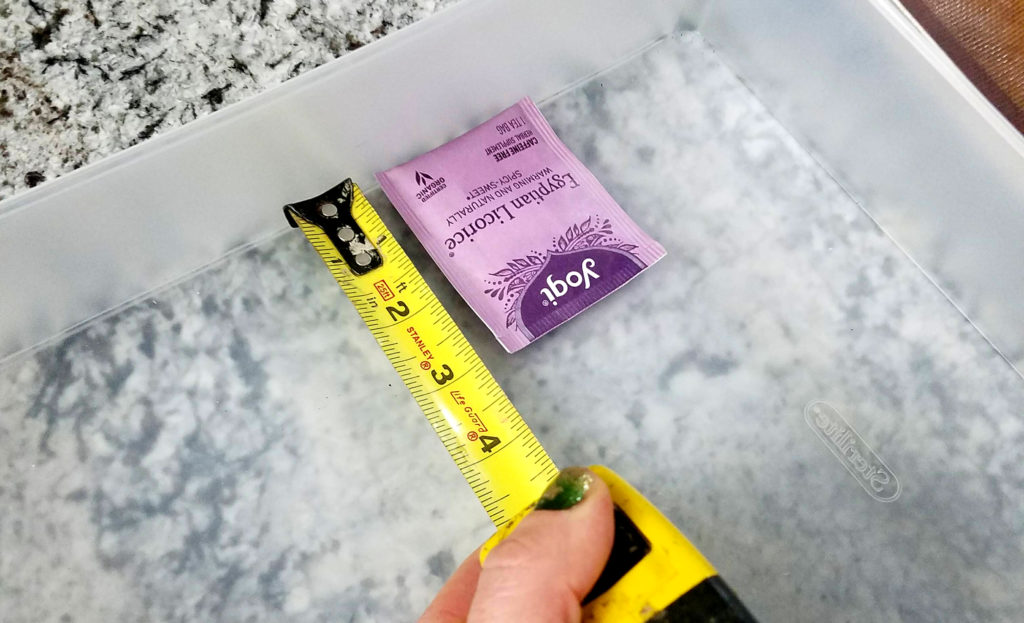
My teabags are slightly too tall for these drawers but as long as I don’t sit them completely upright they will work just fine. Also, I did have some hot chocolate packets & large tea packets that I decided to make a larger space for in the drawers.
After getting all of your measurements, start by cutting your foam board to the size of the front to back length of your drawer using your X-ACTO Knife or carpenters blade . Mine was 13.25″.
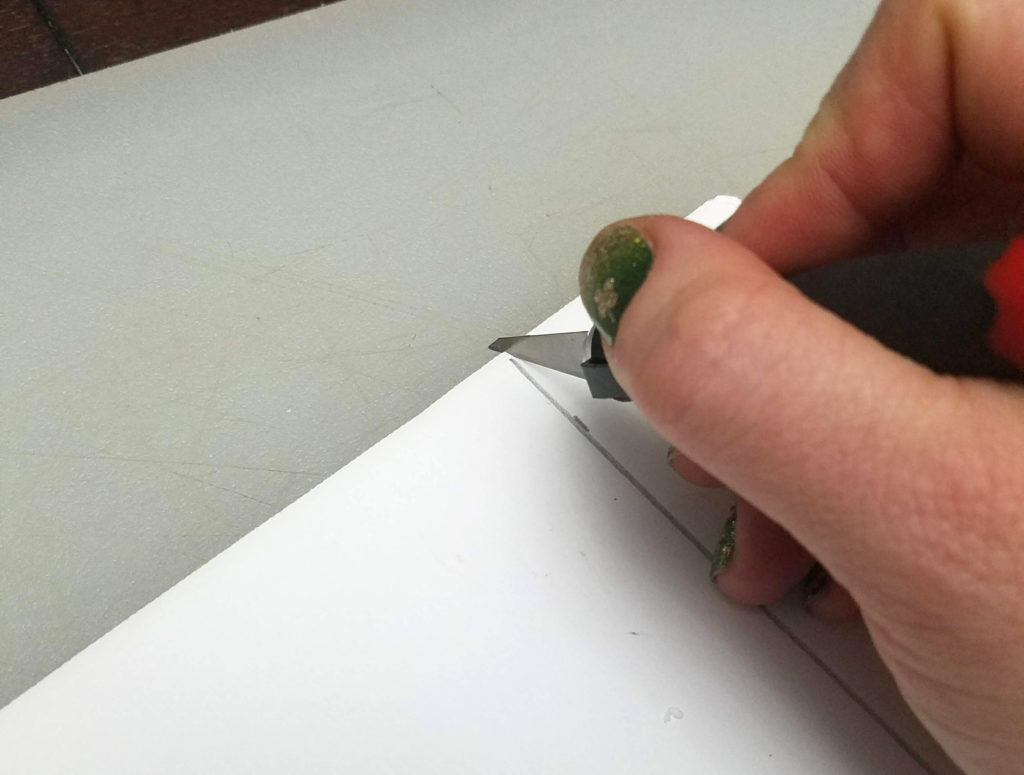
Next measure the depth of your drawer, mine was about 2.5″ deep. Then taking that large piece of foam board (that’s been cut to length), cut off strips of the board to the height of drawer using your X-ACTO Knife or carpenters blade.

I tried both the X-ACTO Knife & carpenters blade, my X-ACTO Knife was sharper so I think it made a cleaner cut. If you have jagged edges, you always smooth them with light sandpaper.
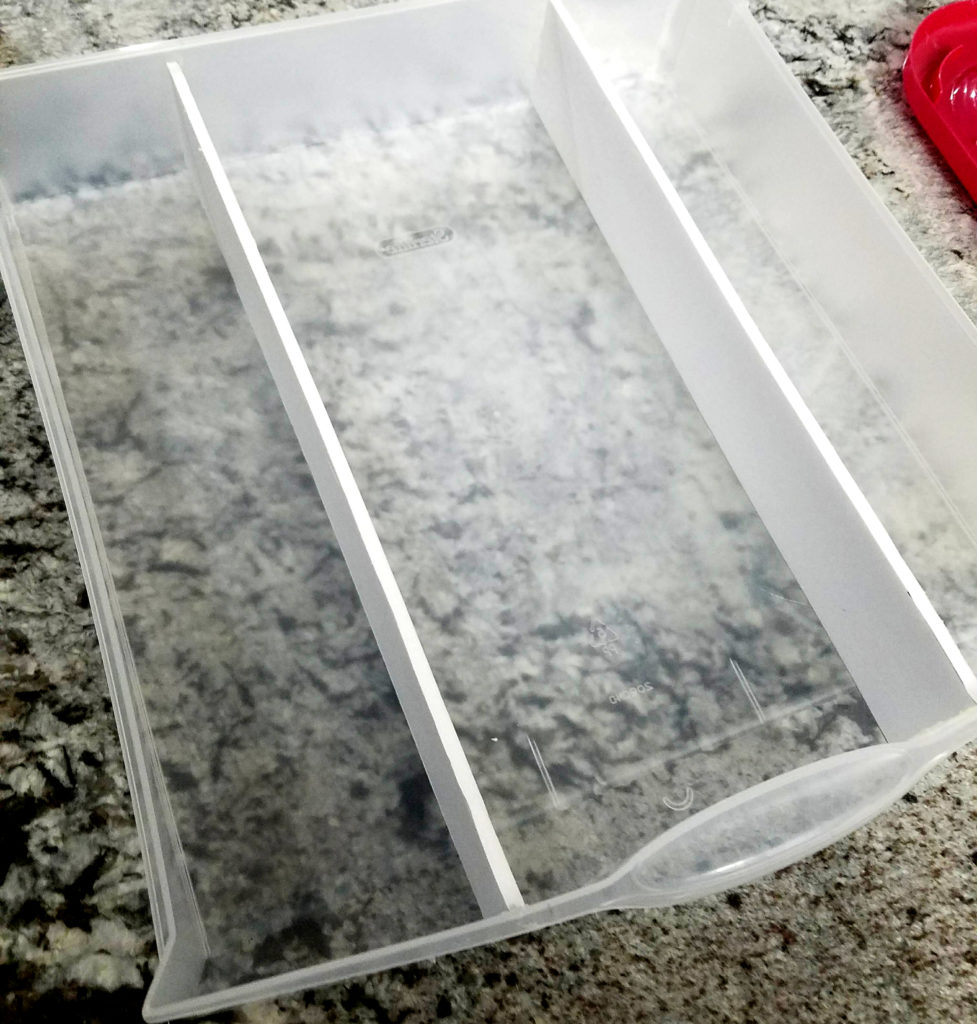
Next dry fit your foam board dividers in your drawer. Make sure you can close the drawer all way with no drag.

This is also a good time to place a teabag in it to make sure you can figure out how many dividers you want per drawer.
Make sure your glue gun is nice and hot and start applying the glue to the edges of your foam board.
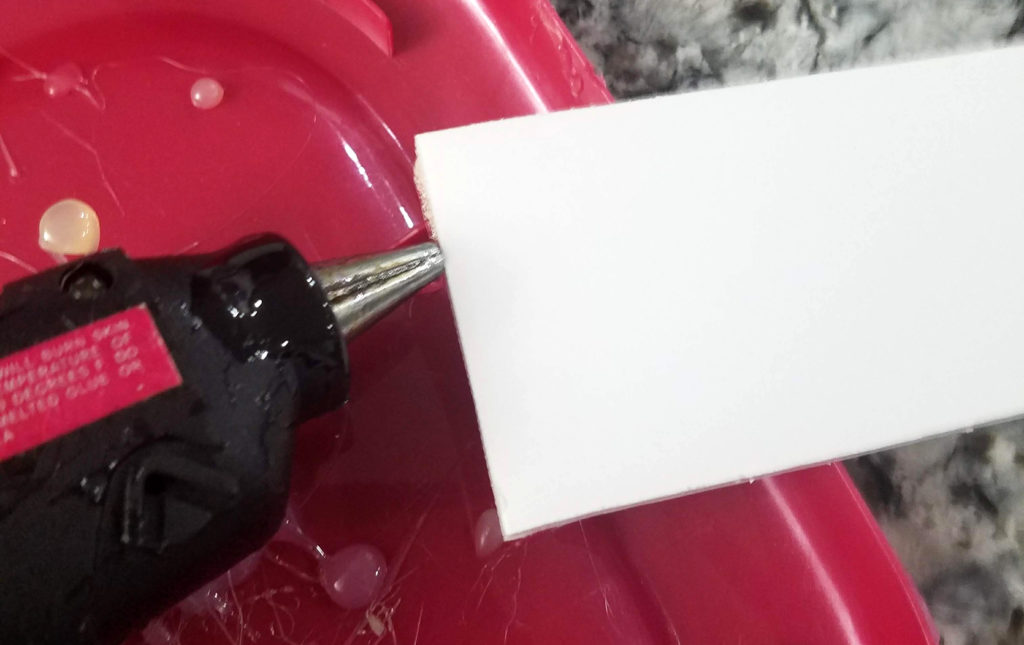
Install your foam dividers inside your drawers. Careful not to drip glue everywhere. (Again, you can always peel cooled glue off if you don’t get it just right the first time.)
Start filling up your drawers!
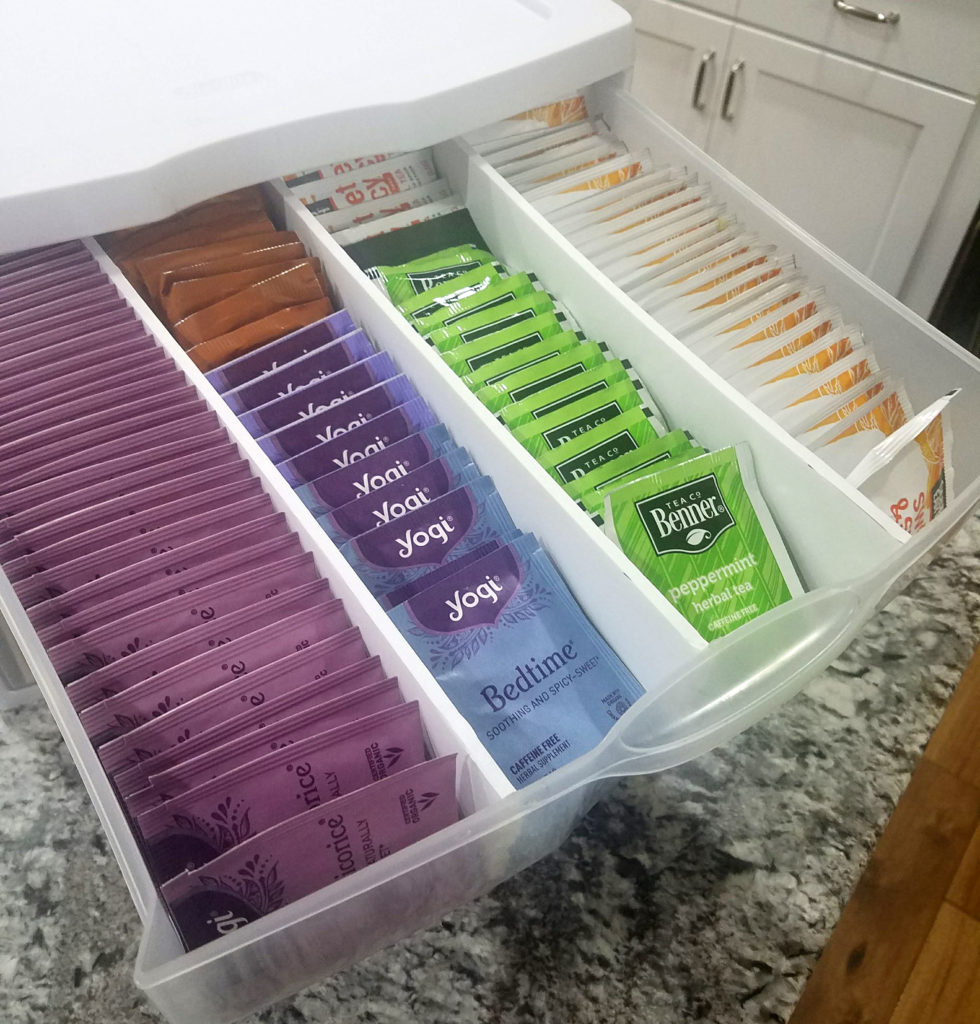
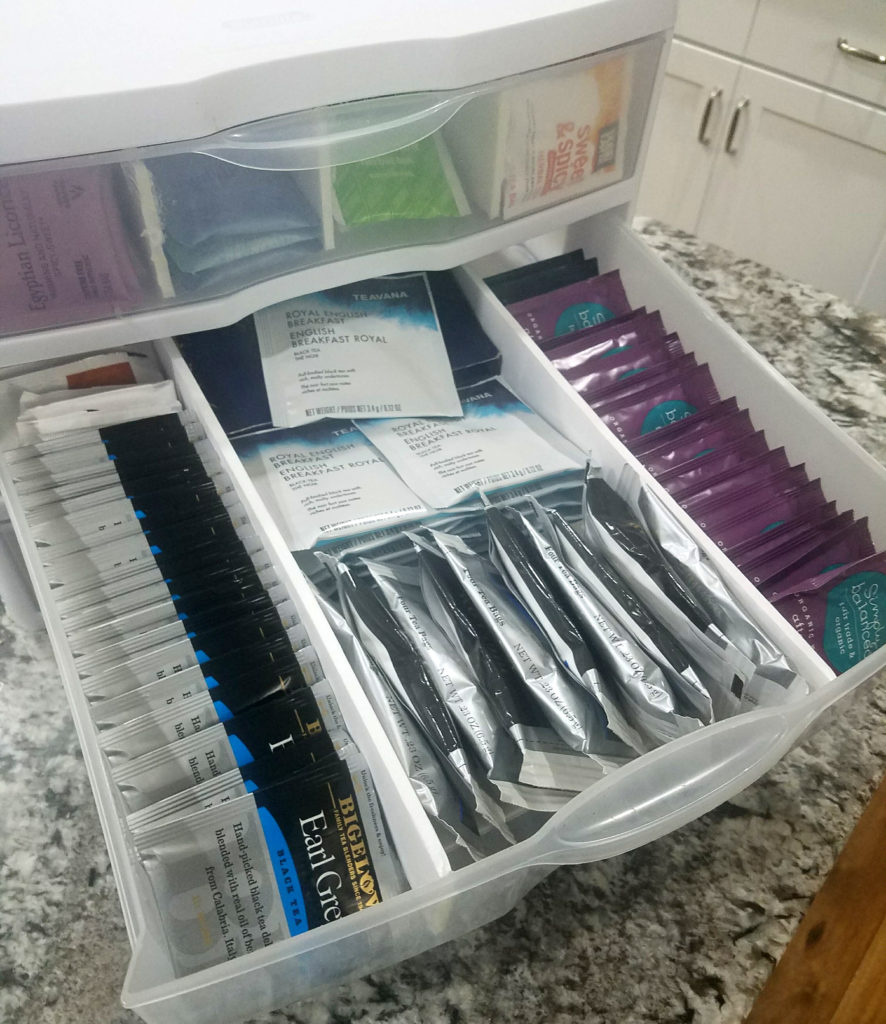
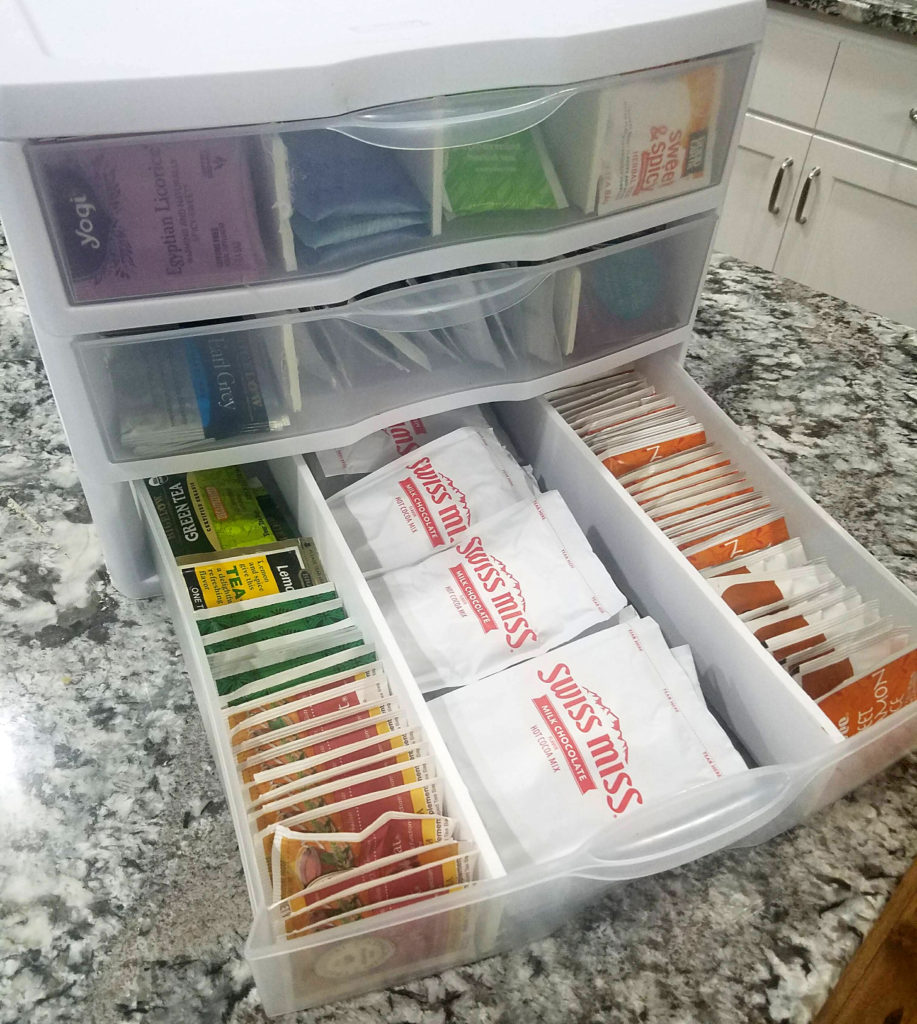
It has made my pantry so much more organized since ditching all of the boxes. Plus it’s so easy to see all the different kinds I have available.
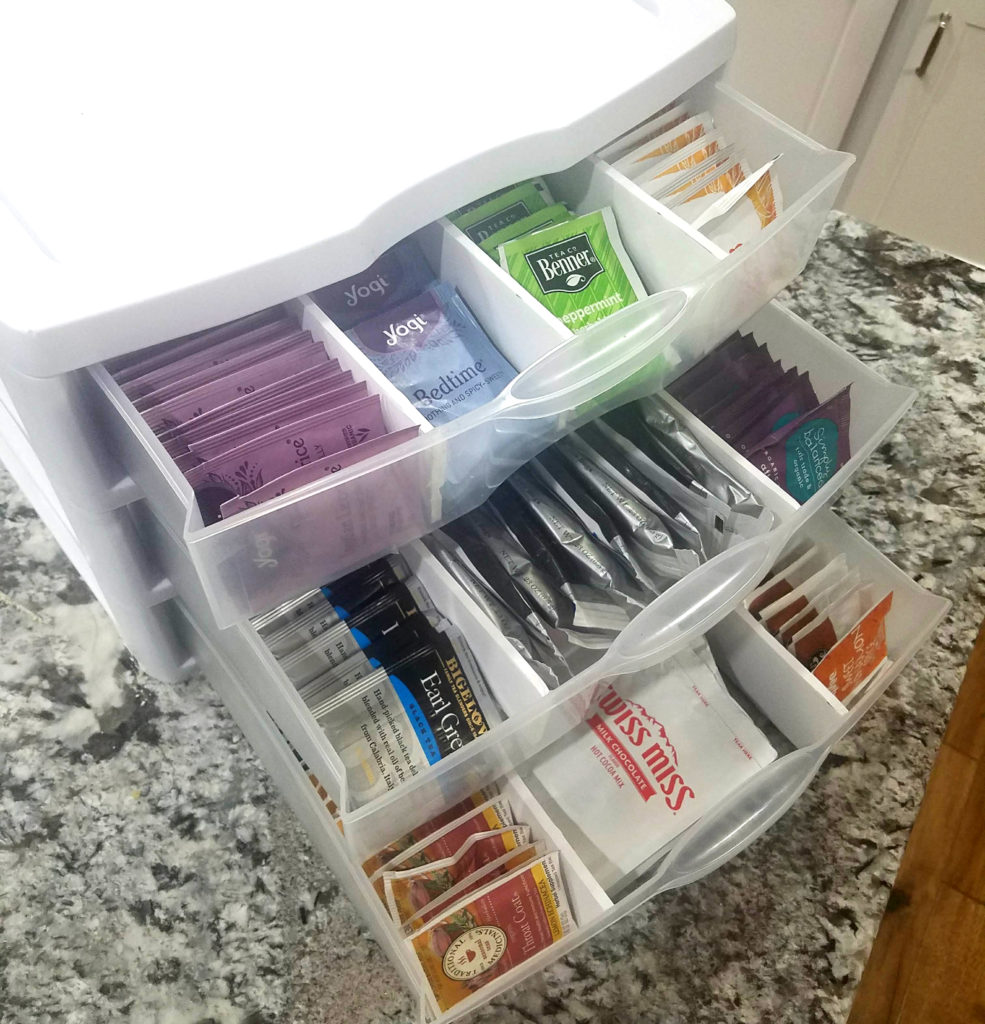
The final look, so easy!

And now confession time. I made this tea organizer last year in March. (Notice my St. Patty Day nail polish?) You know what!?! We still use this thing EVERY. SINGLE. DAY. It’s lasted a whole year and doesn’t seem to be breaking any time soon!
Now go pour yourself a cup of tea and make this!
